Happy Hanukkah!!


So yesterday, as many of you know, was Thanksgiving. What you may not know is this Wednesday was also the first day of Hanukkah! I usually save my Hanukkah nails for December but I got this Zoya color in the mail recently and it seemed so perfect for the occasion that I couldn't resist getting a jump start. I did a simple stripe french for these because the holographic glitter in Zoya Dream really shines and sparkles and I wanted that to be the main focus. I hope you liked these and Happy Hanukkah to those who are celebrating!

Happy Thanksgiving!


Well for those of you who reside in the US of A, today is Thanksgiving! Mostly that means food, family, parades and of course, being thankful!! I have A LOT to be thankful for this year.  I have a new job, which I love. I'm moving to a new city soon, which I could not be more excited for! My family and friends are healthy and happy! I could go on but it's Thanksgiving and...let's face it there is FOOD to be eaten!! Here are my quickie festive nails for today! I've got  a lot going on so I wanted something quick, simple, and easy to transition into fall in case I don't get time to change them!


I used Zoya Flyyn for my base on these and then added a bunch of different colors to create the waterfall! I really considered a matte top coat but since I'm doing some cooking and cleaning today I didn't want to risk chips. This is the FIRST Thanksgiving day I've had off in about 13 years so I'm NOT going to waste it doing touch-ups!


I hope you all enjoy them! Happy Thanksgiving to all my US followers!! :) I hope it's a day full of family, friends, and fun!

The banker always cheats...


It's Movember!! So what better a time to put a mustache on your nails? For those of you who may be unaware, Movember is the month formerly known as November, where men and women across the globe join together to raise awareness and funds for men’s health. Men grow and women support a Mo (mustache) for 30 days becoming walking, talking billboards. Movember supports world-class men’s health programs that combat prostate and testicular cancer.  When I got these little mustachioed water decals from Born Pretty to review, it seemed like perfect timing! The first thing that came to mind, after Movember of course, was Monopoly! Did anyone else play that game like it was your job when you were younger. So many fights with my siblings happened over a Monopoly board! 


I used the mustache water decal on my ring finger and then added a hat and a cane. For the other nails I kept it really simple and just did property cards. I started out with the idea of making them legible but I liked the sort of artsy version better!  I hope you enjoyed these! You can purchase the water decals at BornPretty.com. (These are design sheet 404) They're SUPER easy to use and go on just like a temporary tattoo. :)

Flashback Friday: Pokemon!


It's time for another Flashback Friday!! These nails are from March of 2011 and despite the fact that they are obviously awesome (since they are Pokeballs!), they are a tragedy!!  In 2011 I really wasn't blogging for people, it was more of a way for myself to keep track of my designs and I normally snapped pics directly after I had finished the artwork. Hence the messy cleanup. On top of I wasn't very steady with my hands and I didn't have any legitimate art tools so I was using all the wrong things to make designs. I REALLY love Pokemon so I wanted to do something for the release of Black and White and balls seemed the easiest. I remember at the time I didn't have many colors so a lot of these were mixed to create the different shades. These took an hour from start to finish. AN HOUR. I recall that the net ball (second pic, middle finger) was my favorite at the end and I was WAY too proud of that little "M" on my Masterball.  So...naturally they recently released Pokemon X and Y and I thought, what better time than to recreate these nails?  So here we go:


Biggest difference here (other than the cleanup and neatness!) is the shape of my nails!  I recently rounded them off and it never lasts but I really want to try to keep them rounded for a bit so I'm trying to do things that really work on round nails that might not as well on square ones. This is a great example. Pokeballs just look better round!  I realized after the fact that I also did these on opposite hands this time. Originally I tried to keep the easy ones for my dominant  hand so I wouldn't have to worry about fiddling as much with the difficulty of the design. But this round it didn't even cross my mind. I used my new Born Pretty brush set and also my dotters for these. Also used a Models Own striper for the black lines so that made it a lot easier to do. Additionally, I didn't have to mix any colors because my stash has increased times a thousand!

Here's another pic with the thumb included! For reference, from thumb to pinky we have the Masterball, Ultra Ball, Great Ball, Dusk Ball, and standard Pokeball. I really love how these turned out! And don't think I forgot about the other hand because I surely didn't!


My Luxury ball is still a little "meh" but my pinky nail here is my favorite of the bunch! Also realized this go round that my Dive ball should have had TWO shades of blue and not one so I made sure it was corrected this time. I was also able to use all cremes this time so that everything looked much more uniform. I think it made the Luxury ball look a little more luxe since it has the metallic finish throughout. It also made the little closes on the balls a little more noticeable.


From thumb to pinky we have the Repeat Ball, Dive Ball, Net Ball, Luxury Ball and Net Ball. Which is your favorite? Do you think they look better now or before?

Swatch This! Nails Inc. Disco Lane


OK so I have a new series I'm starting up and this is the first post!  I have SO many colors and I realized when I was packing them to move that there are so many that I've NEVER used or that have never seen this blog! So.... starting this week I am randomly selecting one polish and swatching it for the blog. I hope to swatch one every month but we'll see how it goes! Anyway this is Nails Inc Disco Lane. It was part of a three pack that I bought like a year ago around Christmas time.  It's a black polish with holographic fine glitter. It reminds me a bit of butter LONDON The Black Knight but it's not the same at all.  It went on easily in two coats but it dries a little gritty and not really shiny. I added a coat of Seche Vite and this was the result. Stunning. I can't believe I don't wear this more often! Do you have this color? Do you love it or hate it?

Born Pretty brush set review


So it's not really a secret that I've been on the hunt for some new art brushes. I usually just hit up my local art supply store, grab some random brushes and go.  But I'm trying to do more flat art (freehand) in more intricate patterns and good quality paint brushes can be expensive.  So when Born Pretty offered me the opportunity to review their 15pc brush set, I jumped on it.  The set actually contains 14 brushes in various sizes and a little dotting tool. I thought the dotter would be a throwaway since I already have 11 different sizes but it turns out I actually didn't already have one this size so it worked out! Here's a close-up of the brush heads:


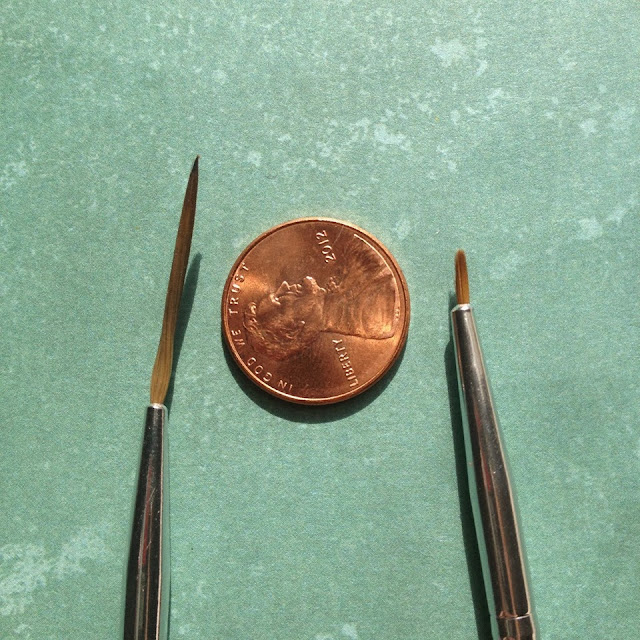
The fan brushes I've just learned to really use over the pat year and the sizes they offer in this set seem SUPER similar if not the same but I love the results you can get with them so I'm excited for new ones. From right to left after the white fan we have the small dotter, a nice long striper brush, a shorter and slightly fatter striper, four various sizes of smaller art brushes and then three smaller square brushes, a fine detail brush with an angled handle, and then two wider large square brushes.   I've already used most of these and they're really nice, especially for the price. They also clean easily. I really love that the smaller detail brush also has a fat handle so it's easier to make more intricate designs with it. You can see that a little more easily in the picture at the top.  Here is a size comparison of the smallest and largest thin brushes:


This small brush is the one with the angled handle.  You can see though, that the smallest is quite small and there is a lot of variation here so that makes it really easy to do almost any design!  I was going to test these all out for you but I've already used them in so many designs so I'm just going to show you some of what you can achieve with them instead. If you're looking for a good brush set, I can highly recommended this set. It's not super pricey, it has a lot of variation and they hold up well.

Here's a peek at what you can do with these! 


I used the long striper brush to make this design!


 A small square brush was used for the giraffe and a small detail brush for the tiger and leopard.


I used the fatter striper for this desgin!


The fan brush was used to make the stripes on the "pumpkin" for this design!

I'm STILL using these and I love them! I can't wait to see what else I can create with these!


You can purchase this set here: http://www.bornprettystore.com/15pc-nail-design-brush-dotting-drawing-p-439.html.


Pay no attention to that man behind the curtain...

dd

Well it's the final day of black and white week with The Digital Dozen.  Honestly when the theme first came up all I could think of were all the black and white films I so love watching! But I wanted to have a variety for the week so I tried to narrow it to just a few!  It occurred to me somewhere a long the way that one thing I love just as much as old films are films whose stories are told both in black and white AND color. Pleasantville, The Giver, The Wizard of Oz...I'm sure there are others but The Wizard of Oz is I'm sure one of the most recognizable black and white to color films there is. SO...I decided to do a little play on it and do a black and white to color design based loosely on the film. I did a field of poppies as my design so it would be something recognizable but simple as to not take away from the fade.  I hope you enjoyed the artwork this week! Please check out what the other ladies came up with for today! Thanks for following along! :)

Shades of Grey


It's day four of Black and White week with the Digital Dozen.  Today I went kind of simple.  I have like, A MILLION shades of grey in my collection. I don't know why.  I mean, obviously I love the color but there aren't a whole lot of uses for that many shades of grey and I can't remember having ever just polished a flat grey nail.  So today I decided to put them to good use!  I pulled out an oldie but goodie, Cover Band's Sticks and Stones, and threw it over the top for a bit of pizzazz and then I matted the whole thing. I actually really loved how it came out. I got a lot of compliments on it despite how drab it seems!  Maybe it's just that time of year! :)  Please don't forget to check out what the other ladies came up with and stay tuned for tomorrow's final design!


The Writings on the Wall


It's day three of Black and White week with The Digital Dozen. Today's nails aren't really black and white but are more a play on words.  It's "right there in black and white" is a phrase people use frequently and so I wanted to do these black and white words on paper. I had a lot of fun with these and it reminds me of how much I really love writing myself! I used to write a lot of short stories and I've kind of gotten too busy to do it over the years. So it's a little bit of a personal theme as well!  I hope you enjoyed them, and don't forget to check out what the other ladies came up with for today!

Rosebud


It's day two of the Black and White challenge with The Digital Dozen!  Today I wanted to try a new design and as you can see, it did not go so well!  I think I needed to choose different colors because my ring finger sort of just looks like some blobs.  But I still had fun with it.  The inspiration was Citizen Kane. A black and white film by Orson Welles.  I've seen the film a few times and honestly, I'm not super impressed by it but apparently it's supposed to be the greatest American film of all time. In either event at the end of the film he dies with a snowglobe in his hand and the last words he utters are "Rosebud".  It ends up that this is a childhood sled he had, which is the only happy memory he has of his entire life. Sad, no? I made some red rose buds to sort of emulate this.  I hope you liked it and don't forget to check out the other girls artwork for day two!!

The Digital Dozen Does...Black and White


Well it's time for another week of fun with The Digital Dozen!! This week our theme is Black and White. It's an interesting theme because it seems very straight forward and yet it's also very open to interpretation.  I started simple today with this dotticure.  It was one of those that I liked better from a distance! I had fun with it though! I can't wait for you to see what the next week has in store for us! Don't forget to check out the other ladies art work below AND don't forget to check out the new Digital Dozen blog as well as our other social media sites for fun tips, behind the scenes info and updates from all us ladies! :)

Orange Punch


So let me start by saying I am not in love with this look!  It was inspired by Helen's models nails for a Project Runway challenge.  I liked the idea of the bright orange and white on bare nails and then the contrast of the black outline. BUT...her model had stiletto nails and while I normally think it doesn't make a whole lot of difference, in this case I think it really did.  The black square line at the top just sort of stunts it and for mostly that reason I didn't love it.  But I had fun doing it!  How do you feel about this look?

Who Are You Wearing? November Edition


Today's Who are you Wearing feature I'm doing a little differently.  Above you can see the inspiration nails and while I love the design the colors are not exactly my cup of tea.  Usually I simply recreate the look to a T but this week I wanted to show you how you can take a celebrity look and make it wearable for other occassions.This look isnt' super loud but I work in an office so the bright colors are a little much.  As a result...I took this look and recreated it in a pastel color pattern...

See the difference? I actually REALLY loved the pastel version. It reminds me of ice cream for some reason!  But the idea is that you can see really stellar designs on others and maybe not be in love with one part or the other, but transform it into something that is unique and wearable for you!  This mani was painfully easy as well. I started by polishing with butterLONDON Fiver, then added a stripe of Cuppa and another of Kerfuffle.  You COULD use tape for the stripes but I didn't bother. Then I topcoated, stamped with Orly Luxe and topcoated to finish. Easy, pretty and still a LITTLE wild. ;)
So who's look am I wearing?


None other than singer Jessie J!  Jessie is known for her sort of out there style so stiletto primary colored nails with leopard is no big deal for her!  Which look do you prefer?

Between the Lines


This is a quick look I put together with some of my new Zoya colors. I'm REALLY loving Payton, a deep wine sort of purple with holographic glitter throughout. You can't see the holo effect in this picture but it's just a beautiful fall color in sunlight or shade.  I threw Tomoko over the accent nail which is another of my must have fall colors. It's not quite silver but not quite gold either. I'd call it a champagne but I feel like it almost leans just a touch too silver for that as well. Either way it's like a foil-y, shimmery, metallic-y matte. It's just stellar. This is two coats so you can see that it's also quite opaque.  I really love these textured polishes as a topper for the standard glossy finishes.  I think the contrast is really stunning! What do you think of Tomoko and Payton? Have you picked them up yet?

A Tribute to Work, Play, Polish


Today's post is bittersweet. For quite some time now we've had Leslie, of Work, Play, Polish, as a fixture in The Digital Dozen.  It's been such a joy to have her in the group. She does AMAZING art and she's always so sweet and supportive. But sadly, all good things must come to an end and  Leslie has had to leave the group. I certainly wish her all the best and even though she won't be posting with The Digital Dozen anymore, I'll be following along her amazing blog every month anyway! Today I wanted to join up with the other girls in the group and give Leslie a proper goodbye!  So I've recreated a mani Leslie did for Love and Heartbreak week with The Digital Dozen! I hope I did it a little bit of justice. You can see her original design below...

h


And please don't forget to check out her amazing blog at www.workplaypolish.com!!

Glitter Gradient


Today's mani is a quick Halloween look I threw together at the last minute for work. I had done pumpkin art earlier in the week but I wanted a change that was still festive but I could wear a little longer without it screaming Halloween!! I went with this simple glitter gradient.  Now, I LOVE gradient nails BUT they are a bit time consuming and sort of a pain to do.  You need the colors, a sponge, top coat, something to mix the polish on....sometimes a toothpick or something to mix them up with, depending on the method. Then there's all the globbing of the polish and the waste. No thanks. I didn't have time for that!! So I want to show you a different method which takes WAY less time and requires nothing more than your polishes.  This works best with glitter since it's not an exact science and the glitter sort of muddles the gradient a bit. It does work with regular polishes as well though. You'll need a clear polish (NOT A TOPCOAT) if you choose that method. So here we go!!


First polish your nails with the base color. I used Lime Crime Peaches <3 Cream. Let that fully dry (or even better, use this to spruce up an old mani which is chipping at the tip!).  Then, take your second color (I've used Color Club Wham Pow) and just brush it roughly at the tip, almost like a French. Don't worry about neatness, you're just going to spread it out anyway.  Last, take the glitter polish* (or clear polish. DO not use a top coat and be sure to wipe the brush between nails) And, starting about 1/3 of the way down the nail, begin to brush it on towards the tip. Each time you take another stroke, you'll see the second color pull and spread down the nail! Easy as that! Top coat and done. Fast, easy and mess free! :)


*for my glitter polish, I used China Glaze Boo-Gie Down

Popular Posts

Like us on Facebook

Flickr Images