The Triwizard Tournament


And...book four!  The Goblet of Fire.   I actually really loved this book as well...I know, I know...but I think it started off a whole lot of new things, like the physical return of Voldemort and also his followers.  It finally threw Snape into the pot as a would be assassin for Lord Voldemort and it started to make things much more real where the threat of the Dark Lord was concerned.  I also loved the idea of the TriWizard Tournament.  I think it was so much fun to see that there are other magical schools and that they might be very different from Hogwarts.  And who can forget Hagrid's new love interest?  It was also sad in a way, of course, since Cedric dies. :(  This book also started to show us Harry's more 'teen' side since he's chasing after Cho and Ron and Hermione's relationship starts to shift more heavily into romance and away from friendship...although, the most we see here is jealousy!  Anyway I wanted to focus my nails around the tournament and the players.  My thumb represents Mad Eye Moody, who, incidentally doesn't REALLY appear in this book until the very end, despite having a large role throughout it.  The index represents Krum and the Durmstrang school.  I used a bit of flocking powder down the center to represent the furs they wear.  The middle, of course is for Hogwarts and Harry.  It's not super exciting: the Gryffindor crest.  The ring finger is for Fleur and the Beauxbatons.  It' s actually holographic since she's part Veela and I thought it was fun that it comes alive in the sun but goes sort of dull in the shade since the Veela are meant to be very beautiful but also very ugly and dangerous.  The Bauxbatons also wore a lot of silver and blue so it worked well all the way around.  And then the pinky of course is for Cedric and his house of Hufflepuff.  I hope you're all enjoying this series!

Don't forget to check my fellow mischief makers, Kerrie, Emma, Abby, Julie, Debbie, and Sam's pages to see their art for this series!!

Check in for tomorrows post on book five: The Order of the Phoenix
Or visit the previous book:  The Prisoner of Azkaban

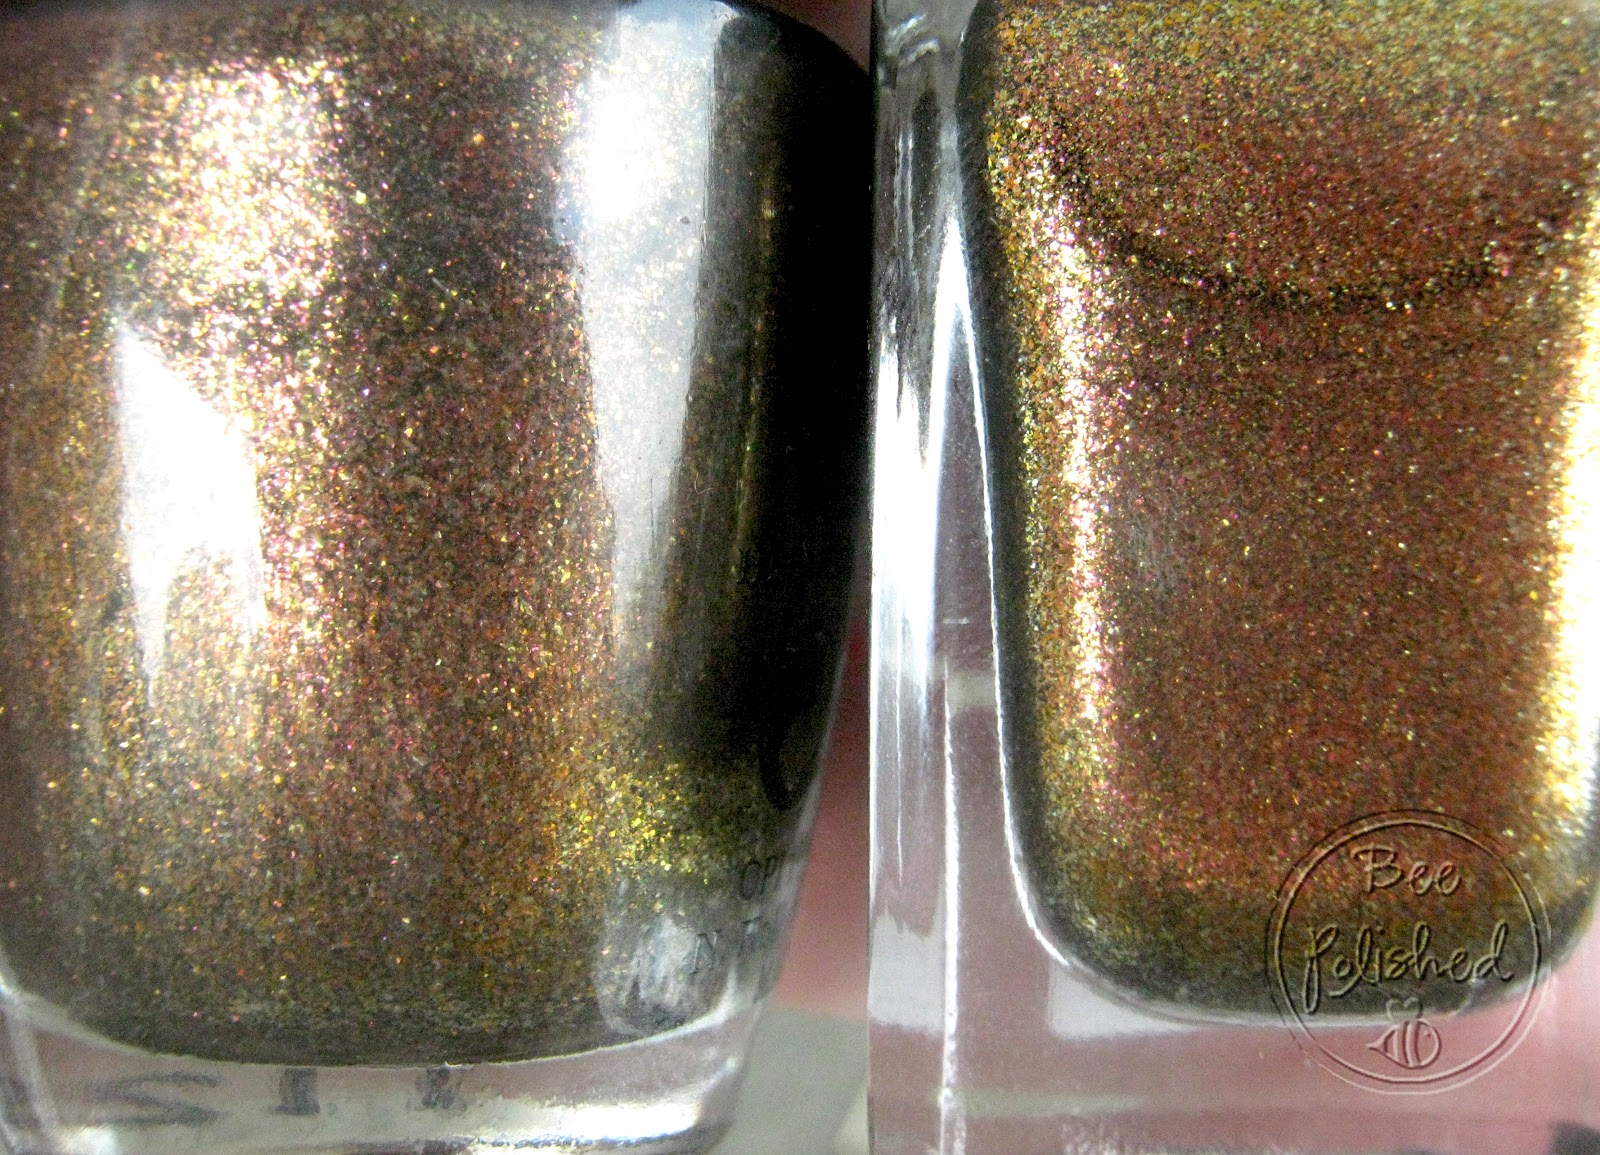
Thumb: Essie Sand Tropez, China Glaze Foie Gras
Index: OPI Red, China Glaze Foie Gras
Middle: Color Club Disco Nap, China Glaze Winter Berry
Ring: Color Club Worth The Risque, China Glaze Electric Beat
Pinky: Color Club Almost Famous, Revlon Black Lingerie

I solemnly swear that I'm up to no good...


Here it is!! My favorite book in the series: The Prisoner of Azkaban.  Why is it my favorite? Well...OK I don't know it's just the one I most enjoy reading.  I think a large part of that stems from the general attitude of the book.  This is the last book in the series before things start to get seriously sad.  Hagrid becomes a professor and does a pretty hilarious job at trying to teach the students about magical creatures!  And it also has Lupin, who turned out to be my favorite professor for the Defense Against the Dark Arts class.  I was oh so sad when he went away! But don't worry...shhh...he comes back!  Harry also got a real, actual, true family member in this book.  No, they aren't related per say but it's the first time in the series he has a magical person to lean to as a real family member and a link to his parents.  I chose to do my nails for this one based on the Marauders Map.  It was a useful tool during this book and I loved the way it came alive on screen.  Those tiny little footprints walking from room to room?  Priceless.  I want one!  Even though I had SO many ideas for designs for this book I wanted to keep it simple and stick to just one theme so I left it at just this.  I think the Marauders Map is representative of many things throughout the book. It belonged originally to Sirius, James, Professor Lupin and Peter Pettigrew. All who are important members of this book.  It was given to Harry by George and Fred, who are the kings of messing about!  Harry uses it to avoid Snape and also in conjunction with his invisibility cloak (can I get one of those too?)  to get all sorts of information which comes in handy throughout the book.  And ultimately, he gets to keep it to use for later endeavors. Mischief Managed.

Don't forget to check my fellow mischief makers, Kerrie, Emma, Abby, Julie, Debbie, and Sam's pages to see their art for this series!!

Enjoy! And check in for tomorrow's post for book four: The Goblet of Fire 
Or visit the previous book: The Chamber of Secrets


Colors used: Essie Sand Tropez , China Glaze Foie Gras and Winter Berry

Spiders flee before it...


It's time for book two in the Harry Potter series: The Chamber of Secrets.  For me, a large part of book two was the basilisk and the overall appearance of snake related things.  The fact that Harry learns he can speak Parseltongue, the snake in the walls, the constant battles with Malfoy and the Slytherin gang.  It's a running theme throughout the book so I wanted it to be the main focus of the nails for this one.  I also wanted to include some of the more important points in the book so for this one, i ran the basilisk through the background of my nails and then used the foreground to showcase some other points.  One of my favorite things about this book was that it sort of isolates Harry from the other characters in a very real way for the first time.  It causes him to question himself and his role as a Gryffindor.  I think the fact that he's ostracized a bit for his ability sort of makes him a bit more relatable to other kids and it also really strengthens his friendship with Ron and Hermione while at the same time solidifying for his own mind, where he stands as a person.  I also really loved Lockhart for his uncanny ability to be both arrogant and also completely incompetent.  We all know someone with Lockhart syndrome!  So for my nails I did Lockharts pixie's on the index finger.  It was the first REALLY crazy thing he did as a professor and it sticks out in my mind from both the films and the books.  I felt it represented him well!  For the middle finger I chose to do a mirror.  Hermione uses the mirror to prevent herself seeing the basilisk head on.  It's a large part of how Ron and Harry find out what's actually lurking in the walls.  It also represents Hermione's role in helping to defeat the basilisk.  In the previous book her smarts got them out of many messes on the way to the final battle but in this book she's not physically present to help them defeat the basilisk so the mirror is really the pivotal point in her assistance.  It leads them to plenty of necessary information.  The middle finger is of course, Tom Riddle's diary.  The most important physical item in the book if you ask me.  Not only does it represent Voldemort's vitality but it also helps them to uncover the secret to his immortality, which later becomes an important piece in the Harry Potter puzzle.  For the pinky I did a few camera's to represent Colin Creevy.  Colin wasn't really a MAIN character in this book but his presence was felt often and I felt he really stuck out for me as a character despite his lack of real presence in a main role.  So there you have it! Book two!  I can't wait for the next one since it ended up being my favorite in the series! (book series, not nail art series...teehee!!)

Don't forget to check my fellow mischief makers, Kerrie, Emma, Abby, Julie, Debbie, and Sam's pages to see their art for this series!!

Next up in the series is book three: The Prisoner of Azkaban 
Or take a look back at book one: The Sorcerer's Stone

Background all nails: butterLONDON Dosh, Orly It's Not Rocket Science, Sally Hansen Chrome Pen in Green
Thumb: Revlon Black Lingerie, LA Nail Art Pen White, China Glaze Velvet Bow
Index: China Glaze Electric Beat and First Mate
Middle: Revlon Black Lingerie, China Glaze Icicle
Ring: Essie Sand Tropez, China Glaze Velvet Bow and Foie Gras
Pinky: Barry M Silver Foil

You're a wizard, Harry...


I'm so excited to finally be doing this series!! I'm sure by now you'll recognize what it is! If you don't...it's HARRY POTTER!! I absolutely love Harry Potter.  I came about it in a rather odd way though.  See, when my brother was younger he HATED reading.  Like, legit hated it.  He refused to do it even when it was necessary so on the advice of someone, my parents bought him the Harry Potter books.  I did not read them.  Later, my whole family went to the theatre to see the film since they'd all read the books and were really excited about the films.  I did not go with them.  Cut to four weeks later and Harry Potter is the new rage, everyone has seen it and it's literally the only thing left in the dollar theatre that my friend Aubrey and I haven't seen.  So what the heck?  We go see it.  I mean, it's $1.50 how bad could it be.   I was skeptical going in but mostly because neither of us had a single clue what the movie would be about.  And we loved it.  I went home and devoured the first four books (since 5, 6, and 7 weren't out yet) and actually went to get the following three at midnight on their release days.  Yeah, I'm THAT Potterhead.  I even took the two days after the seventh book was released off from work...you know, to read the book!  At this point I have all the films and have read the books many times over, even in Spanish and the original British release versions.  It's just such a great series!  So on to the nails:

I wanted to represent some of the more important points of the first book/film on my nails for this one.  I started with a kind of shoddy version of the "HP" logo on my thumb.  The index finger represents Number Four Privet Drive, where Harry lives with his aunt, uncle, and cousin until he receives...the middle nail! His letter from Hogwarts School of Witchcraft and Wizardry.  After he goes to school he learns about wizardry, obviously and also about the wizard sport Quidditch.  I represented the Snitch on my pinky finger since Harry is a seeker for the school Quidditch team.  The ring finger is meant to be the Sorcerer's Stone which is the main premise of the first book.  Harry and his friends, Ron and Hermione set out to find the stone so that Voldemort can't find it and use it to secure immortality.  :)  Excellent books!

Check below for the colors used and don't forget to check my fellow mischief makers, Kerrie, Emma, Abby, Julie, Debbie, and Sam's pages to see their art for this series!!

Stay tuned for tomorrow's post for book two: The Chamber of Secrets

Thumb: Revlon Black Lingerie, Color Club Gingerbread Man
Index: China Glaze Brownstone, Life Preserver, and Fois Gras, LA Nail Art Pen in White
Middle: Essie Sand Tropez, China Glaze Velvet Bow and Foie Gras, and Color Club Gingerbread Man
Ring: Barry M Raspberry and OPI The Show Must Go On
Pinky: China Glaze Electric Beat and Foie Gras, Color Club Gingerbread Man

Rehab Your Nails: Try Me Giveaway!


Well, I have successfully wrapped up my Rehab Your Nails series for this month!  I hope some of the information was helpful for you and that you'll use it to keep your nails healthy and beautiful!  Now that I'm a licensed Nail Technician, I'm sure MUCH more info will be coming in the next few months!  But for now, I want to give you all the chance to win some supplies to help you get your nails into shape. This is sort of a mini-mani giveaway! It has most of the basic supplies you need for a manicure though. :)  The giveaway will run for two weeks and again, it's open internationally but I'm not responsible for lost/damaged items or items which do not pass customs.  So what will you get?

Winner receives one each of the following:
OPI 180/400 file
Cuticle pusher/v shaped nipper
Cuccio Naturals trial sized hand butter in Tuscan Citrus and Herb
Avoplex cuticle oil To Go (this stuff is amazing!)
Zoya mini in Pandora
Block buffer
Sally Hansen Double Duty Top Coat and Base Coat
Nail Brush

Good luck to all who enter!! Thanks for following along!
a Rafflecopter giveaway

Rehab Your Nails: Basic Manicure

It's time for my final Rehab Your Nails post (for this month!!) and it's going to be a good one!  Today's post will show you how to give yourself a basic manicure.  This is going to be a powerful tool in your arsenal when you start polishing your nails frequently.  Nail polish and especially remover will do a number on your nail plate.  So keeping nails healthy by giving them regular care is very important.  Keep in mind that you only need a manicure about once every two weeks.  This is going to show you how to do a manicure with water, but my preference is to skip the soaking portion.  It can weaken nails if it's done too frequently.  On to the supplies!!


I totally forgot to number these.  But...I think it's pretty easy to tell what's what!!  You'll need some cotton balls/pledgets/cotton pads,  all the supplies for basic cuticle care, a nail file*, a nail buffer*, some orange wood sticks, cuticle oil, a nail brush, and, if you're going to be using water you'll need a nail bowl (or a regular bowl that your nails fit comfortably in) and some antibacterial soap. I'm also using a paper towel as a work surface.

*I'm using a 180/400 OPI file.  It's important to use the proper file when doing any procedure on your nails so that you don't damage the layers of the nail plate.  Please do not use any file with a number lower than 180 on natural nails. The same is true for buffers. I'm using a 225 here.  You can use whatever suits you but for this purpose I prefer the 225 grit.

PLEASE NOTE:  It's illegal in most states to perform a manicure on someone else without a license. I'm not going to pretend I'm ignorant and people aren't doing it.  However, I really implore you, if you're doing manicures on other people do NOT use your tools from person to person.  It's not always apparent when someone may have a nail disease or disorder and just like with colds, you can easily spread around infection if you don't know what you're looking for.  At all times we all have a minimum of 7 microscopic cuts on our hands.  It's VERY easy for you to spread diseases and infections.  So use common sense and get new tools for each person or find out your states laws for properly sanitizing them between clients.  :)

Now onto the procedure!!

These are the nails I'm starting with:

They're pretty janky I'm not going to lie.  I waited til I had a bit of cuticle to work with but I also just had acrylics off not too long ago so they're thin and damaged and if you look closely (thumb!) there is still a little bit of acrylic hanging on!  But this is perfect because it will allow you to really see what a manicure can do for your nails and your hands.  So the first step is going to be to file your nails to the shape you'd like.  I went with square. :)  Then you'll apply your cuticle remover.  All you need to do is apply it around the cuticle and follow the manufacturers instructions for how long to leave it on. I'm using OPI Avoplex Exfoliating Cuticle Remover.  I don't necessarily recommend it, but it came in my school kit and it works as well as any other I've tried.


Here are my nails after I applied the cuticle remover.  You just want to cover the cuticle...it doesn't have to be super neat, but as I mentioned before in my cuticle care post, if you feel any pain or tingling PLEASE remove it immediately.  My cuticle remover is gentle on skin but some aren't.  Certain ones WILL eat your skin and that's not pretty! So be careful and follow the directions. If you're going to be soaking your nails that will be your next step.  If not you can skip to the step after!


To soak the nails you just want to add a little of the antibacterial soap to your bowl, add some warm water and submerge your fingers for around 3-5 minutes.  Then you'll remove them and pat them dry with a towel or the paper towel you're working on. Then you'll want to follow a basic cuticle care routine (skip adding oil or lotion!).  Next, use an orange wood stick, a curette, or a cotton swab to clean under the free edge of your nails.  Then you can brush the nails with a bit of water and your nail brush.


Brushing should remove any remaining cuticle remover, cuticle, or dirt or debris from cleaning under the free edge.  After brushing you can gently dry nails with a paper towel and then use your buffer to LIGHTLY buff the surface.  The main purpose of buffing is to remove the shine from the nail plate to help polish adhere.  You can also remove small ridges or minor staining with buffing but it's important not to go too far with it. No matter how often you give yourself a manicure, you should only buff once every OTHER week.


This is how my nails look after they've been brushed and buffed.  At this point you can move on to the lotion.  Just apply it as you regularly would.  I chose to use Hempz lotion.  I really like it because it's thick and it moisturizes very well but it doesn't feel heavy or greasy.  I'm also a HUGE fan of whipped Shea Butters.  Especially the ones made by Shea Radiance. My favorite is the Kalahari Melon scent. :)  But anyway you can use whatever lotion you want to.  If you are going to be doing your nails frequently it's important to choose one that isn't going to dry out skin.  It sounds crazy but a lot of lotions have alcohol in them.  The ones from Bath and Body Works are a HUGE offender for this.  But we'll get to all that in another post!  Work the lotion into your hands, then add cuticle oil to your cuticles and...


Voila! Finished nails.  If you're following your mani with polish then you can skip the cuticle oil until you're finished and be sure to swipe the nail plate with some alcohol or remover before polishing to get all the lotion and oils off the nail plate.  I'm sure you can see a BIG difference from the nails I started with to the nails I ended with though!  I hope you all found this series useful!  I'd love to do more in the future and it seems there's interest in that so there will be more for certain at some point! Remember if there are any specific questions you'd like me to answer or posts you'd like to see you can always email me at BeePolished@yahoo.com!  Thanks for following along!  There will be a Rehab Your Nails Giveaway up later today so be sure to look for it! :)

Damn nature, you scary!


It's the day before I go to State Boards (ahh!) so I went a little lazy with the nails!  Leopard is my new fall back mani. It's easy, fancy, and kind of funky. :P  I think the print is REALLY growing on me...I almost bought a leopard print shirt the other day! But don't worry guys, I'm not gonna go full on Jersey, although just so we're on the same page, I could totally pull it off. :P  Anyway I have a million things to do before I hit the road for my test! So here are some simple and fun leopard nails for you today! They shimmer SO much in the sun they almost looked like Minx. Winning.


Colors used: China Glaze Fast Track, Harvest Moon and Models Own Nail Art Pen in Black

Put Your Dupes Up: Barry M Copper vs. OPI Warm & Fozzie


It's time for another edition of Dupes Up! Today's contenders:
Barry M Copper
Retail Cost: £2.99 (approximately $4.75)
vs.
OPI: Warm & Fozzie
Retail Cost: $8.50
Another of the new Barry M collection and yet another discontinued OPI!  Coincidence?  Well...OK probably...maybe...it's likely!  I couldn't help but notice how similar Barry M Copper was to my already acquired Warm & Fozzie when I got it in the mail recently.  It looks a BIT more sparkly and seems to have a more overall copper tone in the bottle, but as I learned with the previous Barry M vs. OPI dupe...it's mostly down to the bottle shape.  Here's a close up of the two:

You should be able to see more what I'm talking about here.  the OPI has an overall more deep goldish green look in the bottle while the Barry M has more of an overall copper tone.  BUT, see that coppery streak down the middle of the OPI  bottle?  You'll also notice the green-gold halo around the edge of the Barry M  bottle.  It's the same tones just displayed in different ways.  Simply the way the light reflects off the bottle. On the nails?  Different story:


See?  If you can tell the difference between these than kudos to you.  This is taken in natural light.  The shift on the nails is the same.  They're both sort of a warm mahogany jelly, jam packed with tiny flakes of green, copper, and gold.  The Barry M is on the index and ring finger, while the OPI is on the middle and pinky.  There is literally no difference in the formula on these either.  I didn't notice any additional wear on one versus the other and both require a minimum of three coats for full opacity.  Here's another comparison for good measure:


This is the same lighting but a different angle.  In the other picture the OPI looked a hair darker but here you can see they're the same.  I will say the Barry M had a slightly better finish. It seemed more sparkly when it dried and more shiny.  A quick top coat of Seche Vite evened them out but it seems strange that the OPI finish would be sub-par.  Personally, even though Barry M is a drugstore brand, I prefer it to a lot of salon brands because I think it has a great formula!  These new colors are really making me love them even more!! 

Verdict: Dupes.  These are definitely the same in my book. Same color, same formula, slightly different on the finish but with a topcoat they are indistinguishable.

Availability:  Barry M Copper is available at Boots, Superdrug, and BarryM.com. OPI Warm & Fozzie is no longer available in stores but can be had for a reasonable price at many e-tailers including Amazon.com. 

Put Your Dupes Up: Barry M Silvery Lilac vs. OPI Not Like the Movies


It's time for another edition of Dupes Up! This weeks contenders:

Barry M Silvery Lilac
Retail Cost: £2.99 (approximately $4.75)
vs.
OPI: Not Like the Movies
Retail Cost: $8.50

I just recently got this Barry M and a lot of people online have compared it to butterLONDON's Knackered which I have yet to snag.  When I got it though, I was more drawn to a different polish in my collection: Not Like the Movies.  Now, I'll start by saying there are TWO versions of the OPI color Not Like the Movies.  One is a duo chrome which was released with the original Katy Perry Collection.  The other is a silver version which came a bit later.  I have the duo chrome version and that's the one I'm comparing today.


Here is a close-up of the bottles.  Both have a silver base with a lilac/green duo chrome.  The OPI looks like it has MUCH more of a color change in this shot. You can clearly make out the purple as it shifts from green to silver.  The Barry M looks more of a silver/lilac without much change in between the two.  They both also have silver micro glitter throughout.


So here's the lowdown:  First of all, the Barry M had a much better formula, which is surprising given it's a drugstore brand vs. a salon brand.  I only needed two coats of the Barry M for coverage and I needed three of the OPI.  Both were still a smidgen sheer but I think that's just the way this polish is meant to be.  This photo was taken in natural light.  Both have a silver to lilac shift, shimmery silver flecks, and a slight greenish tinge at the edges.  I showed them to numerous people and none could tell a difference, not even my husband who is well trained in the art of differentiating polishes from one another!  The Barry M is on the index and ring finger, while the OPI is on the other two. The OPI looks a BIT darker in this photo but it's not really. If you blow this up (just click it!) you can see that they're the same.  You'll also notice the OPI is a bit streaky though it's not noticeable in person.  There is also a VERY slight shift more towards green on the OPI where the Barry M is more lilac than greenish.  But for all reasonable intents...these are the same in my book.


Verdict: Dupes. Yes there are some VERY SLIGHT differences (the streaks in the OPI, the TINY shift more towards green.)  but honestly, on the nails the differences are not noticeable at all. So I feel comfortable labeling these dupes.

Availability: Barry M Silvery Lilac is available at Boots, Superdrug, and BarryM.com.  OPI Not Like the Movies was part of the now defunct Katy Perry Collection and can no longer be purchased in stores.  It has limited availability online but there are TWO versions.


Wondering how these stack up against another silvery lilac duo chrome, Zoya Ki? Debbie has you covered over at The Crumpet!

Pusheen and Pauline


Well I've been out of nail school for over a month now.  I can't say I really miss it although I had tons of fun while I was there!  Seventy hour weeks aren't really high on my list of things to do and I can't wait to start doing nails for a living.  Awhile back I posted some nail art that one of my nail school friends, Pauline did for me.  I have a few more of those to come but I want to spread them out a little since, sadly, Pauline doesn't live near me so I won't be able to have her do anymore pretty nails for me. :( But here's a little twist for today...nail art I did for Pauline! 

 Thing is...Pauline and I had a little TOO much fun at nail school.  We spent plenty of time learning and practicing, don't get me wrong. But we also spent an inordinate amount of time just being silly and laughing. And lets face it--when all you do is work, sleep, and go to class, a little bit of laughter is a good thing!  Most of the art I ended up doing for Pauline was more because of the fact that no matter how careful she tried to be, she almost always wrecked a nail before they had fully dried.  *sigh*  So you'll notice as these come up that the art is usually limited to the tip of the nail and it isn't always the standard accent finger!  BUT we had fun with the cute designs too!!  This one was sprung from a completely random incident.  Some time ago my husband bought me a necklace.  Knowing I love cute things and kitty things and I have a super fat kitty (who I love to absolute death!) he found this necklace of a fat, kawaii kitty on a balloon.


Super duper cute right?  I love it.  So I'm sitting in class one day wearing said necklace when Pauline leans over and says "Is that Pusheen?"  I think I asked her to repeat her question, like, three times.  "What the heck is Pusheen?" I wanted to know. Pauline tells me to "Google it" and I do and holy freaking cuteness. Pusheen love was born. So when I had polished her nails one day with Barry M Blue Moon followed by a nice dose of Deborah Lippmann's Glitter in The Air, only for her to nick the tip 10 minutes later...I thought, what better a cover up than little Pusheen?  And voila! There you have it!

I hope you enjoyed the art and thanks for following!!

What's Your Sign


Now that my nails are shorter and are starting to look healthier, I wanted to do some fun things for summer. I just got some new Deborah Lippmann's the other day and this is Let's Hear It For the Boy. It's a gorgeous pastel blue.  I thought about putting some art over the top of it but settled instead on Essence Glorious Aquarius.  This is an amazing glitter with iridescent and aqua glitter throughout.  Looks SO pretty in the sunlight! It's a perfect combo for the warm summer weather! :)  It's a simple look for today but I'm loving it! I hope you all enjoy and thanks for following!!

Guest Blogger: Jackie Clark


I have something very special for you all today and I'm excited to share it with you because it's something that is very close to my heart.  I was contacted some time back by a wonderful woman named Jackie Clark, who does outreach for the Mesothelioma Cancer Alliance, a leading web resource for mesothelioma cancer.  Jackie has a really great message to share with you all today and I'm so honored to have her as a guest on my blog.  Three of my most favorite people (and bloggers!) have joined me in doing some nail art to support this wonderful cause so please check out their work by visiting their blogs.  KerrieDebbie, and Emma thank you so much for participating! You can find information about the art I've done to support Jackie's wonderful cause at the close of this blog.  I hope you all enjoy!! 

Return to Style Restores Inner Strength

Remember how great it feels to step out of your home dressed in the latest fashion, carrying a cute handbag and sporting makeup inspired by current cover girl styles? Remember the empowering sensation that flows over you when you know you look great? Perhaps you are one of many women who keeps her eye toward fashion and the intention of nurturing extreme self-care. For those coping with serious illness, this empowering daily routine easily slips out of the picture.

Diagnosis of a life-threatening illness such as mesothelioma cancer, oral cancer or lymphoma radically changes life and daily routines. Women suffering from such illnesses find the flurry of doctor’s appointments and treatments challenging and, at times, overwhelming. Exhaustion and nausea that result from chemo treatments make it easy to forget the importance of caring for one’s appearance.

Finding a few fun new fashionable outfits or accessories often gives the necessary boost to the inner strength and beauty of a woman struggling for her life. Often doctors’ offices have magazines for browsing while waiting. Next time you’re waiting, take a look at any new fashion periodicals in the office. Make sure the magazine is up to date, not a discarded rag from a year ago or so. Then flip through the pages finding new looks and reading fashion tips as you wait to see your doctor.

If fashion magazines aren’t at your fingertips, a little fun fashion surfing online may be in order. Search for 2012 runway fashions, hairstyles and vogue makeup designs.

Whatever way you choose to get in touch with the latest in fashion, be sure to take note of the looks you like best. Consider your coloring and body shape in making your choice, but mostly pick the looks you love.

During treatments for any form of cancer or other illnesses, the body may change in response to illness and aggressive medical care. While you might no longer fit into some of your usual styles, this may be your chance to try some new fashions you’ve never been able to sport before now. Tunic tops and skinny jeans might be just the thing to emphasize your curves while flattering a body that has experienced swift weight loss.

Fresh makeup styles breathe new life into the looks of any woman. Today’s chic designs feature understated cheeks and smooth foundation as a canvas to emphasize either a woman’s eyes or her lips but not both. An easy style that takes little time in front of the mirror involves just a little natural base and bronzer on the face followed by simple lash lengthening mascara. Once the rest of the face features a fresh, natural look, carefully apply a generous amount of lipstick in your favorite shade of red for a stunning retro look that emphasizes the beauty of your shapely, kissable lips.
Illness poses challenges in life. Self-care is of utmost importance in responding to these challenges. When your inner strength begins to fail and your inner beauty fades, give them a boost with fresh fashion.

Check out the Mesothelioma Cancer Alliance blog for more information on wellness.

Nail art was created using Color Club Almost Famous and China Glaze First Mate. It represents the logo for the Mesothelioma Resarch Foundation of America.


Rehab Your Nails: How to apply a silk wrap

We've all been there: you're growing out your nails, they're long and fabulous and all the same length (FINALLY) and then...chaos.  One breaks.  Or worse, splits halfway down so that you have to baby it until it grows out.  Except if you're anything like me you forget to baby it after like, an hour, and then it inevitable rips off painfully. Ouch.  Today's post will not only show you how to fix said break, but also show you how to beef up your natural nails while they're thin or just keep them a bit stronger whenever you feel you need a little more strength! You can wear silk wraps the same way as you wear acrylics but with more of a natural look and less skill!*

*Note: While wraps will cause less damage to your nail when properly applied than would an acrylic they are NOT without their drawbacks.  It will cause minimal surface damage as will any product applied to the top of your nail plate for strength (ie: tips, acrylics, gels, or full coverage false nails).  Wraps do dissolve easily in acetone and should be repaired or replaced every four weeks for maximum strength.


These are the basic supplies you will need to give yourself a wrap.  Some of them, as always, are optional.  I don't think that tweezers, Bond-Aid (or a dehydrator), or accelerator are strictly necessary.  However, if you are not going to use a nail dehydrator I strongly suggest substituting acetone or alcohol because it does really help the resin adhere.  Also, the accelerator is a BIG help since you won't have to wait forever for the resin to set.  You will also need a pair of nail scissors, which I forgot to picture.


This is a picture of the resin and accelerator.  I'm using ASP here but I really recommend Rap Stick. It's sold at Sally's Beauty Supply and it's not incredibly expensive (about $10 for both the accelerator and the resin).  It's much thicker than the ASP, the lid doesn't get glued shut (major bummer), and it's a bit cheaper.  Resin is only good for 6 months so don't buy a ton of it if you don't plan on using it.  Also, I use the Swiss Silk 40 pack of pre-cut silk wraps which can also be purchased at Sally's Beauty Supply for around $4.  If you do choose to use a resin/accelerator set PLEASE PLEASE PLEASE purchase the same brand and be VERY careful with them.  Accelerator should be LIGHTLY spritzed at a distance of about 6 inches from your nail.  Trust me, you don't need much.  If you over spray your nail (spray too close or too many times) you WILL burn the crap out of your finger.  It hurts. A lot. I've done it and it feels like sticking your finger onto a hot coal.  It doesn't cause residual damage and it only lasts a few seconds but if you do it once you won't want to do it again!! I hold my accelerator about 6 inches from my nail and lightly spritz twice.  You may want to spritz it once onto your paper towel to be sure there isn't anything jamming up the dispenser. You want an even, light spray of accelerator.


Here's how to apply the wraps:


This is the nail I'm applying a wrap to.  It's not broken, it's just thin and I wanted to keep it thicker to prevent it breaking while it was growing out.  Start by doing a basic cuticle care routine. Then swipe nail with alcohol or acetone to clean the plate. Then buff lightly to remove the shine and use the Bond Aid or alcohol to dehydrate the nail plate. Don't touch the nail after you've dehydrated it or you'll defeat the purpose.


Next tilt your nail at an angle towards you. If you use the ASP resin be aware that it is SUPER thin. It's like pouring water down your nail plate. I bought tip extenders to use with mine to make it easier. The Rap Stick is much thicker and easier to control. You might want to slide a paper towel in between your finger and your hand so that if resin drips off the nail (which won't happen with Rap Stick!) it won't go all over your hand.


Now drop a TINY dot of the resin towards the top of your nail but NOT TOUCHING YOUR CUTICLE. Rule of thumb is 1/16 of a inch or enough space to be able to turn a file at a 45 degree angle without hitting the skin. Since the resin I use is thin I form a TINY bead on the extender cap and then just place it at the base of my nail. As it runs down towards the free edge, use the tip of the glue to spread it evenly over the nail. Try to avoid the skin.  If you're using the Rap Stick this is going to be a lot easier for you since the resin is more of a gel. You can place the bead and use the cap to spread it while gently squeezing the bottle to dispense more as needed. You just need a thin coat, nothing super thick.

 
This is the gap I left between my nail and the cuticle. You could leave a little more but don't leave less. If it hits the skin your wrap will lift. After the resin is down use the tweezers to place the wrap on the nail plate.  It should also start about 1/16" from the cuticle.  Press the wrap down with the tweezers or an orange stick (or use a plastic bag to smooth it out so that you don't stick yourself to the nail!). It should sort of disappear on the nail.  Once it's down, spray twice with the accelerator. Reminder! Spray from a distance of 6 inches or you will burn the holy crap out of your finger. It hurts. Trust me.  Next you can use your nail scissors to nip the excess wrap of the tip or sides of your finger.  You can use a file to file off any excess that can't be removed with your scissors.  Then add two more coats of resin the same way as before.  You don't need to add more than one silk wrap, just the extra resin.  Spray them to set between coats.


Here is my finished wrap.  When you're finished applying and setting resin you can use a buffer to buff the wrap smooth.  Just be careful to buff gently and not buff off all the resin!  You can add cuticle oil which will not only soothe your cuticles but will also help you see where there are lumps in the resin.  To upkeep a wrap you should add two more coats of resin two weeks from the initial application and at four weeks you'll want to add another silk wrap.  If you're using it to grow out a break you can soak the wrap off easily when the break has reached the free edge.  Be aware also that if you remove your polish a lot or use acetone you'll need to apply the wrap more frequently since it will dissolve.  If you're running short on time a quick coat or two of resin with no wrap can also add strength to nails as well as curb breaks, peels, and tears in the nail.  

I hope you're all enjoying this series!! There will be a final rehab post on May 26th which will also kick off my Rehab Your Nails giveaway!! I can't wait to share it with you all!

Magneat-o


So I'm just going to lay it out there for you guys. Nail school wrecked my nails. Lol...my left hand is a hot mess from having so many procedures done on it and I'm experimenting at the moment with not polishing my other hand for two months to see if polishing really does make your nails less healthy (results will be blogged so stay tuned!).  So...today when my thumb nail--on which the ridiculously thin, damaged part has finally reached the free edge--split down the CENTER of my nail I gave up on polishing.  It's split down about halfway through my nail plate and because both sides of the nail are attached to my nail bed it's essentially a giant crack in my nail which HURTS like a mother.  I bet it takes two weeks to grow off the free edge.  Polishing is a no go til I find some resin to seal this sucker up because it goes straight into my nail bed. Ouchie. :( So here are some fun with magnetic's nails I did awhile back!!  I wanted to try to use the magnets in interesting ways and create art but without doing it as straightforwardly as the magnet patterns.  It looked super cool in person 'cause when you move your hands it kind of has a 3D effect.  :)  I hope you all enjoy!! There are still TWO more Rehab posts and then there will be an awesome giveaway filled with supplies for you to keep your nails feeling and looking their best!

Thanks for following!!

Colors Used: Nails Inc Trafalgar Square, Houses of Parliament, and WhiteHall Teal. Lines drawn with Models Own Nail Art Pen in Black.

What are my cuticles and how do I tame them?


It's time for another edition of Rehab Your Nails! Today's post is all about cuticle care. It's something we all deal with and keeping them healthy and in shape is easier than you think! Here's how to properly push and nip your cuticles!


Tools needed:
1, 2: Cuticle Remover
3,4,5: Cuticle Pusher
3, 6: Cuticle Nippers
7: Cuticle cream

You don't need all of these tools I'm just showing you some different things so you can get an idea of the options you have.  If you're nervous about cutting your cuticles, you can either skip that step or start with a slanted cuticle nipper like #3.  It has a V shaped groove you can simply slide around your cuticles. If you're feeling more confident, choose nippers like #6.  I like to use 1/4 jaw nippers since the blade is smaller which gives you more control.  #4 is a two sided metal pusher.  I prefer this type but if you're new to pushing you're better to start with a soft tip pusher like #5.  Be aware that a metal pusher CAN go through your nail plate so it's important to watch how much pressure you use and the angle at which you push.  I also have some cuticle cream which is optional but a good idea to have.  Cuticle oil would be another great option to finish your cuticle care routine.  If you don't have either of those you can use olive oil or a good hand lotion but cuticle oil/cream is well worth the investment because it really will help you keep your nails healthy and looking great.  Onto the procedure!!


This is the finger I'll be showing you on.  I waited a bit so I'd have a nice amount of cuticle to work with. You may have less or more.  I've added an arrow to indicate where the cuticle is.  You can tell that it's sort of a ledge if you will where the skin of your finger meets the nail plate.  The 'base' of this ledge is your eponychium, which is a fancy word for live skin.  You'll want to avoid cutting that since it will hurt and it will bleed.

Start by choosing a cuticle remover or softener and applying it around the cuticle area.  If you want, you can soak your nail in warm water after applying it (in a semi-thick layer in that case) to help soften the cuticle.  This DOES cause more damage to your nail plate though, so for me, it's not really a win situation.  Leave the cuticle remover/softener on according to the package directions.  If you feel any tingling, pain or other sensations you should remove it with soap and water immediately. Cuticle is DEAD skin. It doesn't have feeling so if you're experiencing pain there is a problem!  I used the Avoplex Exfoliating Cuticle Remover and left it on 3 minutes (or about a commercial break!) before massaging it in to my finger with my other hand.

Now you'll want to choose a pusher.  I'm going to use a metal two sided pusher.  Please PLEASE PLEASE do not buy a metal pusher until you are comfortable with this procedure.  You can seriously injure yourself with one and can even cause irreparable damage to your nail. You can also use an orange stick in a pinch.
Hold the pusher at about a 45 degree angle aimed at your cuticle.  Now using GENTLE, circular motions, press the cuticle back towards your hand.


Start the pusher about a quarter of the way up the nail from the cuticle when you push.  There is skin on the nail plate which will flake forward and come off the nail while you're pushing the still attached cuticle back.  This is normal and it's actually the purpose of pushing the cuticles.  Here's a better picture of what I'm talking about:


You should notice the color difference in my nail where I started pushing with my pusher about a quarter to halfway up the nail plate. See all those little flakes of skin?  That's cuticle and that's what we're trying to remove.  This is another great reason to start with a soft tip pusher or an orange stick. A metal pusher CAN remove layers of your nail. It will look different and it will feel different BUT if you're starting out you might not know the difference. Your cuticle remover/softener should have loosened this skin and made it pretty easy to push off.  You're going to notice that the cuticle which is still attached to your nail is also much easier to see after pushing.  I'm going to show it to you at a different angle so you can see what I mean.


The #1 in this picture shows you the line where I began to push with my pusher.  The #2 is the attached cuticle.  You don't have to cut this.  I never cut mine for years and years and it didn't bother me.  Leaving it alone CAN make you more prone to hang nails if you're not properly moisturizing your cuticle.  But removing it can have it's downsides as well.  It will grow back fairly quickly and if it's not cut properly it will grow back a bit weird.  Nothing to worry about mind you but just enough that you'll have to keep cutting it for awhile! If you decide not to cut then you can simply add cuticle oil or lotion and swipe your nail plate with alcohol or acetone (or wash your hands) to remove the lifted cuticle.  If you're going to cut you'll want to choose your nippers at this point.


I'm going to explain how to use the 1/4 jaw nippers because that's what I use but if you choose to use the V shaped blade nippers all you need to do is place the V at the base of the cuticle and press it gently to the other side of the nail, following the natural curve of the nail plate.  Easy.  It's another great starter tool because it's cheap and fairly easy to use without making your cuticle look like a hot mess.  You can pick up a double ended V blade/pusher for less than $5. These nippers (granted they're VERY nice nippers) cost me around $40.  If you're going to get a pair of jaw nippers you should also be aware that they're only good for about a year.  After that, they're too dull to do much good anymore so keep that in mind when investing.

To use the jaw nippers, position them at the base of your nail and just above the cuticle.  Now GENTLY press them down and then close the nippers. Then, with the nippers still closed, lift upwards, similar to tweezing hairs.  If you're nervous close them slowly. If you can FEEL them, they're on live skin. Reposition and try again.  It's not a race so take your time! You don't need to press hard either.  Just enough so that the nippers are on the cuticle.  When you close them and lift upwards there should be no pulling of skin. If it doesn't cut cleanly and pulls your skin, you need new nippers. 


Now add your cuticle oil and....voila!! Pretty, cuticle free nails! You'll notice I did leave a small cuticle on my nails. I prefer it this way since I work with my hands and don't always slather on lotion. If I remove them completely I get a lot more cracks in my eponychium.  I hope you all found this helpful!  I can't wait to share more tips with you all!


Popular Posts

Like us on Facebook

Flickr Images