Ch-Ch-Ch-Ch-Changes...


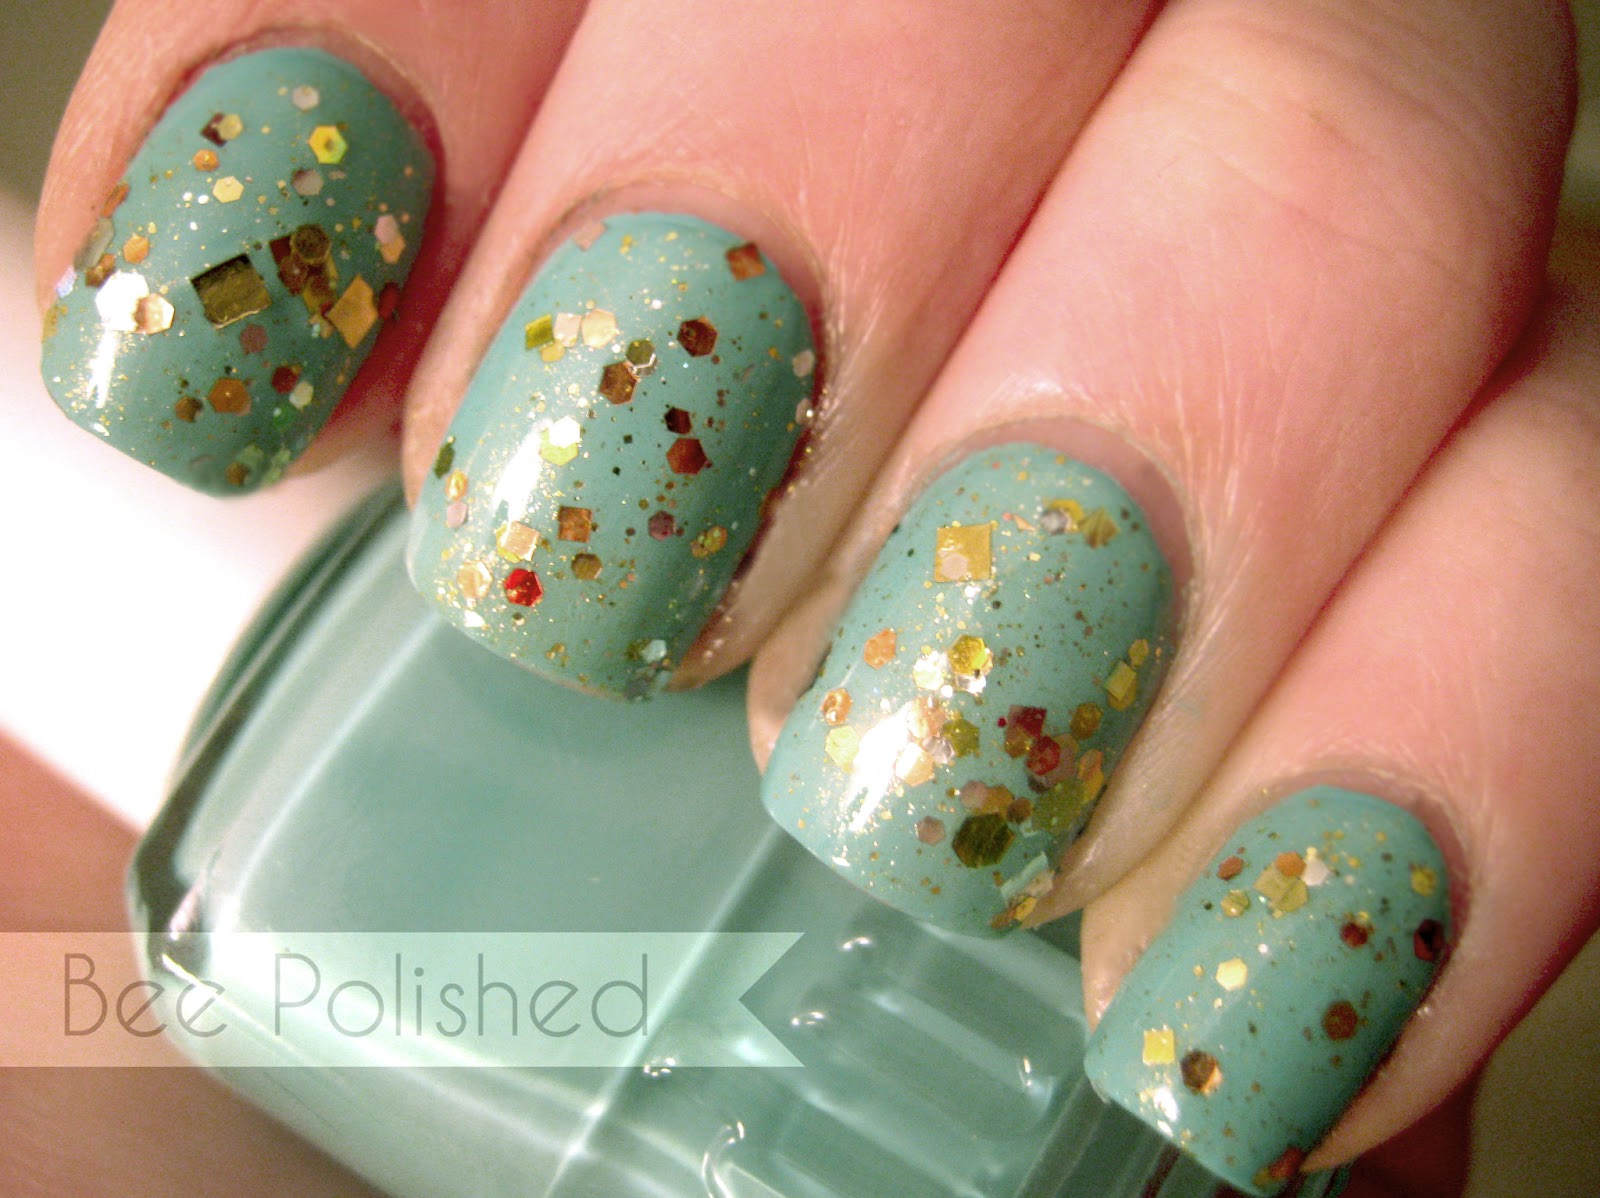
This is a mani I did awhile ago that I sort of forgot about!  I just found it in my cache the other day and thought it was a perfect time to show it off!  It features one of my favorite color combinations: green and gold!  It's a simple combination but I loved it anyway! The base on this is a Duri color and I have to say, I'm still really loving Duri.  Not only are they affordable but this is ONE coat of polish.  ONE. COAT. Plus they dry super shiny.  I can't wait to get some more of them!!


Colors used:
Duri: Summer In the City
Lynderella: Change

BadAss Polish: Go Pack Go!


It's time for another BadAss polish!! I'm so excited about these.  The last one I did was so much fun with the stars and the silver glitter.  This one is also from the "Are You Ready For Some Football" collection and it's inspired by the Green Bay Packers.  It's called Go Pack Go.  It's a green glitter with larger goldish yellow hexes.  I'll be honest and say I didn't love this one but it's really just a color preference.  It applied easily and like the one before it I didn't have to do any fishing to get the hexes out.  I first swatched it over Duri One Summer Dream, a creamy yellow.  I love the way the green stands out on they yellow and it's definitely easy to see the inspiration on this one!  I like that the polish is saturated too because that means you can do one easy coat, as shown above, and not have to keep layering it up for effect.  After I had it over the yellow I decided to go for it over green as well...I mean...might as well!


Here it is over two coats of China Glaze Paper Chasing.  As you can see the effect completely changes which is something I love about multi glitters.   Now it's the gold that stands out and the green which provides a little extra sparkle.  Obviously you could wear this over any number of colors.  I think I really prefer the yellow to the green but it's nice either way.  Go Pack Go dried a little gritty as most glitter do, but again I used one coat of Seche Vite and it was shiny and smooth.  The hexes were easy to apply and they are not curled or raised at all.  I feel like you could almost wear this one on it's own if you wanted to layer it up a few times.  One coat is VERY glittery. I didn't try layering it on it's own but I feel like three coats would be sufficient.  

Which way do you prefer Go Pack Go?
Like this polish? Show your support by checking out BadAss Polish's Facebook page!

You can purchase BadAss Polish at their Etsy store.  


This polish was sent to me for my honest review. I have not been paid and all thoughts and opinions expressed are my own.

Flashback Friday: Betsey Johnson


It's time for another Flashback Friday!! It's been awhile since I did my last one and it took me a little bit to decide what to recreate! I think this one is a good one because it's a combination of French manicure, moon manicure, and freehand vs. stamp.  It's from March of 2011 so almost two years ago. See when I first started doing nail art I wasn't part of any nail groups online.  I hadn't done much research and I wasn't really that great at doing much more than some dots.  So I invested in some stamps and for my first BIG challenge I did THESE nails....warning: they are a HOT. MESS.


I started this blog, as I'm sure most of you know, because I was sharing my nail art all over my Facebook page and texting it to my friends and family and I wanted a place where I could just put it up once and everyone could see it.  It was also intended to be sort of a personal journal of my art. So naturally, clean-up, photography and other blogger no-no's weren't really a concern of mine.  I polished. I took a quick pic. I uploaded it with a color list. I was done.  Originally, I used a stamp to do the leopard print and now, I'm able to freehand it.  I really prefer the freehand version too because the print is a bit bigger and it makes the design less busy.  Originally I used a tip guide to do the pink tips.  For the second version I free handed them.  I've always been fairly decent at free handing tips so I don't know if that's really an improvement BUT for the original I stamped and then had to figure a way to color OVER the stamp so I did white and then pink and ended up with super thick tips.  For the new version I used a cotton swab in acetone to remove the gold from the tips and then filled it back in with the hot pink.  For the original version I used a guide for the moon and for the new version I free handed it.  For the original I stamped a white bow and then tried to fill it over with a pink. For the new version I used a white/color single stamp technique to do it all at once.    I think of all the mani's I've done this one probably shows the MOST progression. I love it both ways though!  It was based on some Betsey Johnson earrings I got from my husband. :)  I used two of the same colors for the new one: Orly Luxe and Prince Charming.  For the black I used Zoya Raven for the new one and since I don't have the pink anymore either I used butter London Primrose Hill Picnic for the new version.  Which version do you prefer?  How much do you think you've improved since you started?

Red-dy for my close-up


Day two of red week is here and I really think this was my favorite day of the challenge for me.  I know I shouldn't say that since it kind of ruins the rest of the week...lol...but I promise there are still cool things coming.  I just really liked this simple contrast.  I didn't know what to really do with the dots from yesterday and didn't want to add a ton more so I went ahead and turned them into a solid gold panel on my nail.  Then to add some pop between the gold and the red I added a thin outline of black with a Models Own nail art pen. It crossed my mind to stamp over one side of this or the other but I just couldn't stop admiring how clean it looked so I decided to edit myself and leave it as is.  If you're just starting to read along with the challenge, don't forget to check back at Day One to see what I started with.  Tomorrow things start to get a little bit crazy!! So stay tuned!!

And don't forget to check out what my fellow Red-skateers are doing for the challenge!!

Fool's Gold


This is actually a mani I did for Christmas which never made it to my blog.  Since it's pretty cold outside though, it's still a nice winter mani! It was surprisingly easy to do even though it looks kind of intricate which makes it one of my favorite kinds of mani!  I used a base of Barry M Gold Foil, but then because it had a much flatter finish than I expected it would, I put two coats of Essie As Gold As It Gets over the top.  You can't see it very well in the picture, but it gave it a nice sparkly finsih that was a little more what I was going for.  Then I used Orly Ma Cherie for the red lines and dots and Orly Wild Wisteria for the green ones.  I entertained the idea of putting some gold in the centers of the green but then decided to leave it as it was!  I hope you guys enjoy and thanks for following!!

Cracked Up!


A nice easy one today to start the week!!  I did some crackle nails awhile back with copper and a mint green polish which I LOVED.  Then I got this green polish in a clearance sale for around $1 and I decided to test it out.  The color is beautiful but it seemed super plain on my nails and even though I tried a hundred times to come up with something snazzy to put over the top, I just couldn't find anything I liked.  So I went with my old staple of,  "If you can't figure out a great art for your nails: Crackle it." And I did.  I used gold crackle this time because it had more contrast than the others. I did later use this and a similar color in lots of Christmas mani's! I guess I just got it too early in the season!  In other news, my nubbins from January are very nearly back to where they should be so when I get some free time (read as: next Sunday) I will try to get the rest of my flakie dupe posts ready to upload.  AND new mani's (which do not have ugly nubbin nails) will be showing up on my blog! :)  (My luck all my nails will now break today in class/work.)

Hope you all had a lovely relaxing weekend! Enjoy the nails and thanks for following!!


Base is: Orly Wild Wisteria 
Crackle is: China Glaze Cracked Medallion

Popular Posts

Like us on Facebook

Flickr Images