The Digit-al Dozen does...art


It's time for another week of Digit-al Dozen art!! This week the challenge was...art!  I based my designs for the week on types of art, rather than recreating famous art work or trying to do anything super intricate.  I'm not a great real life artist!  These nails are based on body art, or tattoo's!  I wanted to choose images that were fairly common in the world of tattoo artistry so I chose flowers, feathers, birds, hearts, tribal, stars, Chinese characters and some swirly designs.  I used a nude color for the base and then matted the whole thing for a more 'skin' like appearance.  :)  I hope you can see the inspiration!  Don't forget to check what the other girls came up with for today's challenge, and stay tuned this week for more art inspired posts!


Colors used:
Zoya Avery

Hard Candy The End
butterLONDON Matte Top Coat

Use it or lose it...


This has been my life for the past oh...week and a half or so.  Polish sorting.  I HATE polish sorting. I also love polish sorting because I find all sorts of great things I had forgotten I had.  I also find out things like I have three of the same exact color. Fail.  The thing is, even with a spreadsheet it's still hard to keep track of nearly 1,000 polishes. Not only that but it's frankly overwhelming.  Many of these I have never used.  Many of them I WILL never use.  Others I use all the time.  On the whole I find myself reaching for the same colors most of the time.  I'm not sure if that's because those colors are the ones I remember I have most often, because they're my favorites, or just because they're already out of the helmer which means no digging!  So I have laid down some new rules for 2013.  If I don't, haven't and won't use a polish...it's out.  Already I have listed quite a few on my blog sale page.  Most of them are polishes I've never used once or those that I used once and didn't care for or didn't go back to for whatever reason.  You can HELP ME!! Help me get rid of all these polishes I'm not using and give them good homes. :)  My goal is to get to ONE helmer (God help me) and then to maintain that helmer.  No new ones til old ones are out.  I'm not sure how well I'll be able to stick to that...I already have quite a few pretties coming in the mail.  But here's hoping! 

Do you have an overwhelming stash?

Go Scratch It: The Evil Eye


Today I have a review for you!  This is a company who was once a Kickstart* so I'm extra excited to share it with you all! I don't use nail wraps often, to be perfectly honest.  They're great when you're in a hurry or for intricate designs that you might not otherwise be able to achieve on your own. I just find the quality and ease of application to be hit or miss.  I first tried the Sally Hansen ones and was very pleased with how easily they applied and how long they lasted.  I was not so pleased with the cost and the fact that once you open the pack you have to use every wrap or they'll dry up and be useless.  Then I tried the Nail Rock and Essence strips.  Turns out they're just stickers and not polish at all. Major fail. Not only do they not look great but they're ridiculous to remove.  So I was skeptical, as I always am, when these showed up in the mail.  One thing I love about them is the way they're packaged.


They're all sealed in a little plastic bag.  BUT it gets better because when you open the pack they're all nestled in they're actually individually sandwiched between two additional layers of plastic. While I'm not 100% sure that this will help preserve them longer, they've been sitting in a drawer for a week now and they're all still pliable and ready to go so I have a feeling it will help a lot.  It also makes it super easy to match them up to your fingers and apply them one at a time.  I applied mine without first buffing and without base coat. I washed four sinkfuls of dishes directly after and had zero lifts or wear. With top coat they lasted a full week on me before the tips started to wear.  That's excellent considering most regular polishes only make it four days.  I was sort of disappointed with the shapes.  I feel like some are too narrow and some are way too square (like the first one you see up there).  But I can see how it might benefit people with wider nails and they can be easily trimmed down if needed. This pattern is not even close to being the coolest one they have available so I really encourage you to check out what she has to offer on the site.  Here is one on my nail!


I used Barry M Navy on my fingers and the Evil Eye strip on my accent nail.  You can see that it's shiny and looks just like the polish.  No lifts or weird flaps like I've seen with other strips. There are seriously some awesome patterns available on the site and $12 gets you 16 strips, a nail file and an orange stick for easy application.  I really encourage those of you who like the ease of strips (and those of you who have had bad luck with previous ones) to check these out!! I'm eying the Rococo Gold ones next!!

Buy your own set at: GoScratchIt.com.


*Kickstarter is a funding platform for creative products.  You can visit the site and choose independant upcoming businesses or projects to support!  I'm a BIG supporter of helping small business and innovators so I love this site! Check it out and help out some local (or not so local!) creators!


 These were sent to me for my honest review. I have not been compensated for my opinion.

G is for Glitter All The Way


This year's holiday collections really didn't do much for me.  I have plenty of greens and reds and golds.  There were only two China Glaze's that I decided to pick up and one of them was only because my husband insisted.  This is the other. It's called Glitter All The Way.  It's a multi-glitter with bits of green, purple, red and gold.  It does have decent coverage; this is three coats.  It also dried pretty smoothly for such a concentrated polish.  This is two coats of top coat and no Gelous.  I don't really love the multi-glitter effect.  I just think this is too much in one bottle.  But if you're into multi glitters then this one has a great formula and is definitely worth the $$!

Thanks for following! Don't forget to check on what Emma and Kerrie chose for the letter "G".

Under the sea...


Today I have a simple combination for you.  I got Mermaid's Dream for Christmas from my wonderful husband and I decided to layer it over another color since it's quite sheer.  I started to use Catrice Sold Out Forever and then I waffled  on Are You Blue or Green before I finally settled on butterLONDON Bossy Boots.  I like that it's more green so the blue and gold glitter stand out a bit more.  I might try to just layer it up on it's own later to get the full effect but it was a nice simple mani for the day! :)


butterLONDON Bossy Boots
Deborah Lippmann Mermaids Dream
Seche Vite

Rehab Your Nails: What is a long nail bed?

Do you have short nail beds? Long nail beds? Wide nail beds?  Do you even know the difference?  It's difficult to tell sometimes since there is no defined length or width for nails.  The reason for this is that everyone's fingers are a different length and width.  The size and shape of the nail should be in proportion to the size and shape of the nail bed and the fingers.  When your nails are within proportion, they are at their strongest and most appealing.  So how do you know what length and shape to make them?  Well that's where it gets a little tricky...let's take a look at a few nails shall we?


I bet it didn't take you very long to figure out what the issue here is.  The nails are too long.  Some of you might be intrigued by this but I'd bet less than 10% of you looked at this picture with any kind of envy or adoration.  These nails are way out of proportion. Now let's look at another picture:


Again I'm sure it doesn't take very long to figure out the problem here. The nails are way too short.  Not just SHORT but these nails are actually some that have been bitten and you can see where the nail bed is becoming injured and growing a new "skin" which will keep these nails stunted for life.  It's easy to spot the problems when they're super obvious  but how can you tell when nails are just slightly dis-proportioned?  My intention here is not to make fun of anyone or look down on anyone so I didn't want to pull any pictures from the web for this lest anyone should come across them and feel badly about themselves. So let's look at my nails for a minute:


I'm lucky because I have naturally long nail beds which means that unless I grow my nails to ridiculous lengths, they are always in proportion.  Here's how you can tell if you do too:


I've labeled the width and length of my nail bed here.  I want you to notice that I did not include my free edge when I did the length.  I'm showing you my nail BED not my nail PLATE.  It's important to see the difference.  The nail plate you can control. The nail bed you cannot.  You can see that the length of my nail bed not only exceeds the width but is more than double the length as the width.  This is a proportioned nail.  Why?  

Aesthetically speaking the preferred width to length ratio is 50%.  In plain English that means that the width of your nail should be no more than half the length of the bed.  If the width is more than half the amount of your bed length then your nails are wide.  If the length is less than twice the length of the width, your beds are short. If the length exceeds the width by 50% your nails are perfectly proportioned and if it exceeds it by more than 50% (as mine do) your beds are long. Now that you know what makes a short nail bed, the next question will be how to fix it.

  You have no control over the width of your nails.  So the variable here will be the length. The easy thing to do is to grow nails to the length that will be twice (or close to) the length of the width of your nail bed.  The perfect length for everyone will vary BUT  there are a few things to keep in mind when growing your nails out.  One thing is that there is a perfect length for your nail type, structure and usage level.  You probably already know what this is because your nails will begin to break after that point.  You can increase it by changing your habits, diet, or adding strengtheners to your routine.  Another thing to remember is that your nails have a delicate structure and you don't want to  unbalance them.  Nails should never exceed in length the total length of the nail bed.  You can see the line I showed you on my nails to display the length of my nail bed.  If I were to measure that line and reposition it to start at my free edge (the area where it first begins to look white) you would be able to see the maximum length my nail bed will support.  Growing your nails past that point not only looks unbalanced but also weakens your nail.  Try this trick at home to see what I'm talking about:

Place a pencil or pen on a table.  Now move it towards the edge slowly, so that the end of it begins to hang over the edge of the table.  Inch it forward slowly and wait for the point where  it falls off.  It should be at just over half the length of the pencil.  Every millimeter your nail grows slightly weakens it's structure, just like with the pencil and at some point, it will become too much.  Keep those tips in mind and you'll be on the way to beautiful proportioned nails in no time!!


Please note:  These opinions are that of trained professionals and facts from many years of research. No two people have the same nails and you are the only one who can say if you like them or not.  This is to be used as a guide for those who want to achieve healthy, structurally proportioned nails and is not to be looked at as an assault on anyone's individual opinions or choices.   

The Beginning of the End...


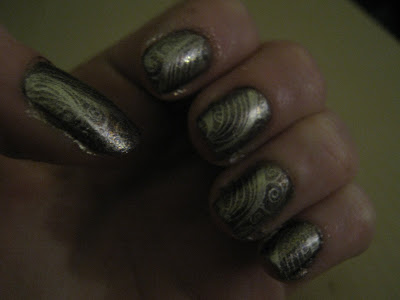
Oh Lord. This might be the scariest thing I've posted on my blog!! This ladies and gentlemen is my very first blog post of ever.  I want to point out, as I've said numerous times, that my first several pictures were never intended for blog use.  When I first got into nail art I would send my husband pictures of what I was working on via cell phone and that's why they're so terrible. They weren't really intended for wide spread viewing!  My first ACTUAL for my blog post was this post from February 25, 2011.  It's BETTER than this original one, but still needs obvious work.  I wanted to recreate the first post  I did though, not my first intended-for-blogging-post.  So here it is in all it's hideous glory.  I didn't even bother with clean up on this and the lighting is so bad because it was the only way I could get the gold to really show up in the picture.  Miraculously, I still have all the polishes I used for this particular post and I've definitely improved my polishing skills. Even without cleanup my nails never look as messy as they do in this picture.  Lighting and camera skills are a big part of what I've learned and tweaked and improved on as my blog has gone on.  So without further a do....here is the new version!


See a difference? ;)  

I think lighting is a big thing with pictures because not only does it just  make everything look nicer and neater, but look at the glorious gold undertones that have been completely lost in the first photo. The magic of the base color is really muted because the lighting is so poor. I hope to improve even from where I am now  by the end of 2013 and I really want to try to invest in a new camera and possibly a new lighting system this year.  A light box would probably benefit me tremendously. Still, I feel great about where I've come and I can't wait to keep going!

Thanks for following! I hope everyone had a wonderful new year!

Popular Posts

Like us on Facebook

Flickr Images