Rehab Your Nails: After Enhancement Nails


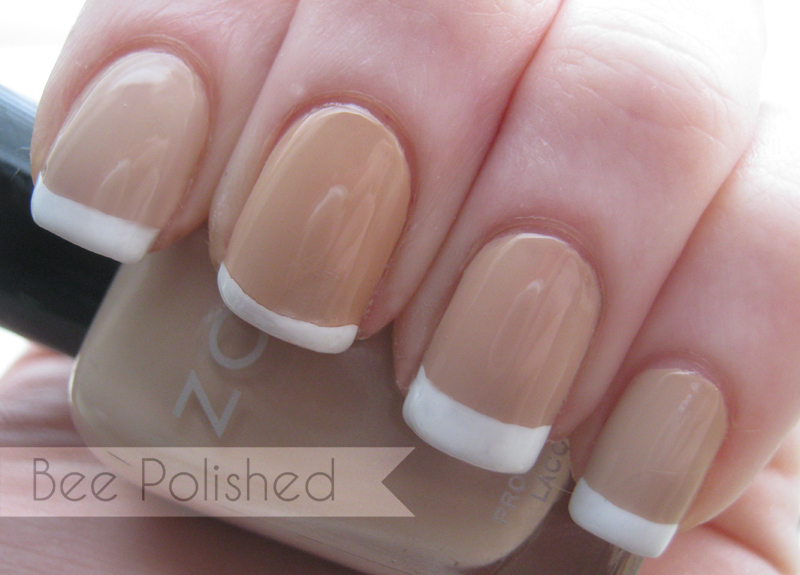
Alright ya'll...for this particular blog I have gone ALL the way back into the archives and found this picture from 2012. This is MY nails and this was actually taken AFTER I had done a full workup on my nails which were damaged from like, seven sets of acrylics in nail school. Hard to believe that this May I'll celebrate 7 years of being a nail tech...and seven years of not having to put my nails through repeated abuse. :P  At any rate this is a good picture because it's from a previous Rehab Your Nails post about caring for nails after you remove acrylic AND how to properly do it. So if you have on acrylic nails now and you're thinking of removing them yourself PLEASE pop on over there and take the time to read about how to do it properly. Improper removal is one of the leading causes of nail damage from enhancements. As a nail tech there is nothing worse than a client who chooses to remove a perfectly applied set of enhancements (and this can include plain gel polish even though it's not technically an enhancement) at home and then comes back for damage control. Once the damage is done it's SO much harder to repair than a proper removal is.  Now of course another reason for damage is improper application and that's typically caused by a tech using a drill incorrectly. But it can be caused by overfilling, over-prepping, under-prepping and lots of other things so for now, let's not focus on blame because to be perfectly honest with you....anything you put on your nail -- including polish -- causes damage. Some minimal and some not so much but you'll almost always end up with some kind of damage to your nail from regular use of product. So the question is how do you care for your nails when you've just had off enhancements?

In general nails will be thinner and weaker than they were before the enhancement and they may actually FEEL thinner since you'll feel a lot more when the enhancement is off. It's kind of like how the first time you apply lipstick your lips feel suffocated but after awhile you don't notice it anymore. So a nail strengthener can go along way to soothing the nail, adding strength, and also helping to alleviate that feeling of vulnerability. If the nails are very thin, like the ones in this picture (they may have a lacy appearance) then they should be cut to avoid painful breaks.  Regular use of oil and lotion will help the nails grow faster and healthier and of course, AVOID WATER. Like super avoid it at all costs. Water plus thin nails = disaster. If you like, you can apply a layer of clear (or colored) gel polish for awhile to add some thickness to the nail while the thinnest parts grow out. But I would caution against doing this unless you plan to wear it the full length of suggested time, which is typically two weeks. Removal of gel polish is hard on nails and nails that are already thin and weak will sustain extra damage. Last tip: give yourself time! Healthy nails take 4-6 weeks to grow from matrix to tip so don't get discouraged if you're not seeing a difference. See that picture above? The arrow indicates the damaged nail and below it is my healthy nail growing back in. It will take time but you'll see it!!

:)

Rehab Your Nails: Stress Breaks


Today we're talking about STRESS breaks. Stress breaks are pretty common and they are called that, not because your nail is stressed out, but because the nail tends to break at the stress points. A lot of things can cause stress breaks so if you fall into this category of nail types it's likely that a few changes may eliminate this issue for you. Of course, it can also be hereditary and it can also be a cause of damage to your matrix, which we'll talk about further down in this blog. But let's start with how to identify a stress break.  If you look at your nails, do you see that point where they start to turn white?  That's where your free edge starts and your nail bed ends. That may be basic information to most of you but did you know that that area and a few millimeters below it is the stress point of your nail? This is where all the pressure gets absorbed and it's why your nail is most likely to break on the free edge or just below it. A stress break commonly occurs on the side of the nail and typically below the free edge. That's important! A break above the free edge is usually either a brittle nail or just a typical break which can happen to anyone. A break BELOW the free edge is going to either be from serious trauma or stress. If your stress breaks are caused by usage (ie opening cans with that nail, using it to pry things, repeated pressure on the nail in that area which can come from typing or other types of work...) then you can simply baby your nails with lots of oil and lotion and stop using your nails as tools. ;P  If your stress breaks are hereditary, you can help improve them by using oils and lotions daily, limiting the amount of daily wear on them by, again, not using your nails as tools, avoiding water (yeah, again.), and if they're really bad, using a layer of gel polish to strengthen nails. DO NOT use strengthener. This can actually make stress breaks MORE likely. Nail strengtheners are for thin nails and nails with too much flex. They are not meant for normal nails. If your stress breaks are caused by permanent matrix damage then that's going to make things a little more difficult for you. In my case, my nails have a specific growth pattern to them. Your nails do too and everyone's nails are a little different. Some grow straight, some curve gently, some curve a lot. As they start to come off the free edge, take a look at your c-curve.  If it's extra curvy or bends under on one side or the other this can also cause stress breaks since part of your nail takes more pressure than the rest. You can help fix this by changing the shape of your nails. And rounded nails will almost ALWAYS benefit a person suffering from stress nails. But in some cases the matrix damage may be causing part of your nail to grow thinner than another. Again this creates a constant area of breakage. So what can you do? Stick to a solid routine of oil, massage and lotion daily, and again...DON'T USE YOUR NAILS AS TOOLS! Stress breaks are my biggest issue and unfortunately, one of the best ways to avoid them is to skip regular nail polish changes. The more you expose these nails to remover, the more you dry them out and leave them prone to breaks. But since I don't plan to stop polishing anytime soon, I make sure to oil throughout the day and to only do waterless manicures. Unless I'm on a vacation or in the summer when I'm in water a lot, I generally see really good results from this routine and you will too! Always keep in mind that nails grow from the base not the tip. Any new routine should be followed for a minimum of four to six weeks to see results. :)


Rehab Your Nails: Brittle Nails


Today we're going to talk about brittle nails. First I want to talk a little bit about how to recognize that you have brittle nails. A lot of times people with this nail type will think,

 "My nails are so strong, why do they keep breaking?"

That's because brittle nails do usually appear to be hard and strong. They are typically thick and by all accounts seem to be the picture of a healthy nail...until they break. People with brittle nails will usually find that the corners or edges of their nails are always snapping off. It's best for them to be kept shorter and rounded to prevent this. But what's going to set brittle nails apart from stressed nails and other types is HOW they break. They should snap off cleanly, possibly even making a sound when they do so. 

Try this: choose a nail on your hand which is at least 1/4" past the free edge. Slowly -- SLOWLY push the corner up against a hard surface at an angle. If your nail has give --even a little--then you don't have brittle nails. If, however, your nail does not start to flex a little, then you'll be in this category. So what can you do?

That's going to depend on some factors. Brittle nails are topically caused by diet, outside additions of product, or medications. They can be genetic and people often see this happen as they get older but for the most part brittle nails have a definite cause. You don't have to know the cause to improve their health but know that if you're on a medication or you are genetically blessed with them that you won't be able to fully change them to normal nails. 

The first thing you should do is STOP ALL NAIL TREATMENTS. Seriously. Stop. Your biggest enemy is nail strengthener. These work to make nails stronger and what you want to do is make them more flexible. So if you're using a nail strengthener discontinue use immediately.  If your nails are square, adopt a more rounded shape for awhile to prevent corner breaks. You're in the lucky category of people who don't NEED to avoid water manicures (although I typically recommended that everyone avoid them as much as is possible) but do make sure to use a really great oil after your manicure followed by a thick, nutrient rich lotion. Since brittle nails are usually dry you'll want to avoid harsh soaps and detergents as much as is possible (so wear gloves when doing cleaning!) and a daily oil massage is imperative. I love to use CND Solar Oil and I find that it's great for keeping my nails strong and healthy but don't feel like you need to invest in a fancy or expensive oil. Jojoba, avocado and olive oil are cheap and wonderful for nails. You can do a paraffin dip once a week in the beginning OR if you'd rather you can do a hot oil treatment. All you need to do is remove all your polish, generously apply oil on your cuticles (optionally cover this with a moisture mask) and then put your hands in a bag or in cling wrap and cover with a heating pad or warm towels for about five minutes. Once the treatment is done you can cover hands with your lotion (I love this set from Zoya and also the CND almond lotion) and do a little massage. 

Remember to give any treatments 4-6 weeks to see results. Healthy nails start at the BASE of your nail not the tip and it can take a bit to grow out. ;) A great way to remember to oil nails daily is to make it a part of your routine. Keep it beside your bed and use it as you read at night, or pop a bottle near the shower and do a quick massage as you get out. It's a few minutes a day that will make a HUGE difference! :)

Rehab Your Nails: Peeling Nails


OK so hopefully last week you found out what your nail type is. Remember you can go between types so don't get TOO stuck on the type you currently have because unless it's caused by genetics or a medical condition it probably can be changed. Even if it is permanent you can still help improve your nails by following some simple care routines and avoiding your nails biggest enemies. Today we're talking about peeling nails and even though I wrote a blog about this recently that talks about ALL nail types, you can guess what's the worst thing for peeling nails. Water. In fact, overuse of water or oversaturation of the nails is often a huge cause of peeling nails. So if you're nails are in the peeling category the first thing I'd do is try to figure out ways to minimize the time your nails spend in water. This means waterless manicures (which we'll go into detail about in another blog!) and  gloves while you wash the dishes or clean (or maybe convince your housemates to clean up for you :P). Some people are not going to be able to avoid it. If you're in a profession where you need to wash your hands frequently or are dealing with aquatic animals or maybe even a stylist who is washing hair often, you're unlikely to be able to keep your hands out of water but where you can you should still minimize it. 

So what else can you do for peeling nails?


In the short term you can use a gel polish, even if it's just clear (you can layer other polishes over it if you want to!) to strengthen the layers. Be sure to brush the gel polish OVER the tip of the nail to help hold the layers together. You can also brush nail glue over the tips if you don't have access to gel but be aware that constant water will break down glue and gel so be sure to reapply as needed. The third option you have is a tip wrap but I tend to avoid adding things like that to nails that are already in a weakened state. If you do want to use a tip wrap, I recommend having it professionally done so you don't accidently cause more damage. This will help the layers that have already separated stay together as they grow off the nail plate. You'll also want to use a nail strengthener on your nails. OPI Nail Envy, Duri Rejuvacote, and Butter London Horse Power are all great options, if you want to avoid nasty ingredients choose Rejuvacote 2 or Butter London Horsepower which are free of formaldehyde. You can brush these on over the gel polish if needed, or just brush and cure the tips with gel and use the strengthener on the nail. Totally up to you! The other thing will be moisture. Your nails will need an oil massage everyday until they get stronger and every other day is a great option after the peeling has grown out. You can even do a little matrix massage (massage the base of your nail and the skin just at the base) to encourage growth while you massage the oil in. The extra oil will help nails grow strong and add flexibility. 


One of my favorite ways to give nails a quick pick me up is a paraffin dip. You can use a gentle exfoliator first, then add oil, then a moisture mask (I love this one from Zoya!) and then once the wax has been removed give your hands and cuticles a little massage. A paraffin dip is optional but especially in colder months it really gives your nails a nice boost! (Pro tip: Zoya also sells Smart Pod packs for pedicures and manicures. You get a soak, which you can skip for hands if your in the peeling category, a scrub, a mask, and a lotion for $9 ;P)

Thanks for reading along! Stay tuned to learn how to care for all the nail types! :)

Rehab Your Nails: Enemy Number One


Yesterday we talked about nail types and hopefully you were able to find yours because as I continue this series knowing your type will give you a lot of helpful information about getting them their healthiest.  Today I want to talk to you about one of your nails BIGGEST enemies; water. We don't typically think of water as being bad for us and many of us probably even use it for our regular manicures, but that's actually NOT the best idea. Why?

Well remember those layers we talked about yesterday?  You probably remember (especially if your nail type is peeling) me mentioning that your nail layers are held together with "adhesive".  Well those layers are constructed horizontally. So the water you soak your nails in makes it's way between those layers of adhesive holding your nail together and begins to break them down. Even worse, when you add soap to your manicure soak (or your sink while you wash those dishes!) you break down even more of those adhesives and oils that keep your nails healthy and strong. You probably notice how weak your nails are after you soak them and even though they do eventually go back to "normal" over time use of water breaks them down and depletes their health. People in professions where hands are washed frequently or where they're often in water more often than not will have short nails that peel or bend because of the constant breakdown of those oils and adhesives. 

One other way water in your manicure routine can be a bad thing is that it can shorten the wear time of your polish. When you soak your nail before you polish it your nail absorbs all that water. You'll likely notice they even change shape, becoming wider and flatter. That might make them easier to polish or make for a great picture but what happens when all that water evaporates and your nail returns to it's normal shape? That's right...the polish also moves and the stress weakens it and can even cause cracks and chips.  

So the moral of the story? The next time you do a manicure, skip the water! There are SO many products out there today that can dissolve and soften cuticles and if you're looking for a warm, relaxing spa treatment I highly recommend a paraffin bath. Not only do they keep skin soft but they'll also help strengthen your nails instead of breaking them down! I'll talk about some of my favorite waterless manicure products later in this series and give you some tips for how to keep your polish on longer, so keep checking back as the week goes on! ;P


Rehab your nails: what's my nail type?


If you're a long time follower of this blog then you'll probably remember that a few years back I had a two part series dedicated to getting to know your nails and taking care of them. Mostly it covered basic things like paraffin dips, nail wraps, choosing the right lotions and oils, and similar things. I even tested out some of the most popular nail strengtheners for you. Today I'm bringing the series back for a few short posts intended once again to help you embrace the nails you have and care for them in the most effective way.  You see...we're all different. Besides having different skin types and hair types, did you know that we all have different NAIL types? Most of us, myself included, can tell you if we have dry hair or oily hair. We know if our skin is combination skin or sensitive skin. But I bet most of you have no idea what your nail type is, and just like you'd buy specific skin care or hair care to meet your personal needs, you need to be thinking about your nail type when you choose products too.  Today we're going to discuss what those types are and how to identify which type you have. Next week I'll lay out some treatment plans for each type and teach you how to take care of YOUR nails. No matter what your type is!   Let's start with what the basic nail types are:

Your nails may fall into multiple categories OR they may change between categories. If you've recently stopped wearing acrylics, for example, you're probably in the after enhancements category. Six months from now, though, you may find your nails are in the brittle category or in the normal category again.  Each of these types presents it's own challenges and even though they seem obvious, often people are unsure what's really going on with their nails or they're making assumptions which are incorrect.  If your nails break easily, for example, you might choose a nail strengthener to try to help. But if your breakage is cased by stress then your strengthener can actually be making them WORSE.

So which type is yours?  Well let's go through them, shall we?

Normal Nails:  A normal nail will be the most common type of nail.  They should be strong but also flexible so they're able to withstand normal traumas. The edges will be white and uniform and the nail bed should be healthy and not discolored. Normal nails can still break and be weak but they shouldn't snap or bend excessively. 

Peeling/layered nails:  Peeling nails or layered nails are pretty obvious. These nails will be thin and weak and peel at the tips or edges. This can be caused by product or genetics and happens when the nail loses it's natural adhesive and the layers begin to separate and peel off. Short term peeling is usually due to a trauma, a product, or poor nutrition. Long term or chronic peeling is likely to be genetic. Remember that nails can change as we age too, so don't assume that it can't happen later in life and still be genetics!

Brittle Nails:  Brittle nails seem strong but will break with very little pressure. The nail does not flex and will crack off in a chunk. You may even hear a snapping sound when your nail breaks. If your corners chip off frequently you may be in this category. Breaks should be clean with brittle nails since there is little to no give in the nail.

Eggshell Nails: Eggshell nails are likely to be genetic. These nails are very thin and weak and almost appear to be flat from the side.  They will bend with very little effort and often appear to curl forward as they come off the free edge.

Lacy Nails: Lacy nails are also weak and tear easily. The free edge will be extremely thin and areas of it will appear translucent, hence the name, lacy. They snag clothing and are difficult to grow to any length at all.

Stress Breaks:  These nails will seem to be VERY strong. They are thick and healthy but tend to break on the sides or at stress points. Unlike brittle nails, which we discussed above, these nails will not break off in chunks at the tip but rather, will tear at the sides as they grow, sometimes below the free edge.

After-enhancement nails: These nails are any nails that have recently had enhancements removed. That could mean acrylics, gels, or even gel polish. They are going to be varying degrees of healthy since enhancements can be damaging in different ways. They may feel thin, the beds may be inflamed and in severe cases they may have rings or divots if a drill was improperly used by a tech for removal or application of the enhancement. 


So did you find your type? Were you surprised by what it is? Maybe you've even been in a few categories over the years.  Later on we'll be talking about what your type means and how to care for it without further damaging it! :)


Rehab your nails: On the go cuticle care!


Well, fall is nearly upon us and that means winter is not far behind.  If you're anything like me (or you live anywhere that gets as cold as it does where I am!) then you know how terrible winter can be on your nails.  There are lots of ways to combat this, one of my favorites being paraffin dips, but aside from that one thing that can really help is keeping hands out of water.  Frequently wetting nails can actually weaken them so in the winter, waterless mani's are a great alternative to the traditional ones. Keeping your cuticles under control is especially important in the colder months when they can easily dry out and crack.  So today I'm going to tell you how you can do a quick 10 minute manicure with ZERO water!  This is so easy that those of you who work in offices can get away with doing it at your desk with minimal interruption to your workday!  I'm using mostly OPI products for this but generally speaking all you need is some lotion, a GEL cuticle remover, and a cuticle pusher.  I've added a file to the picture above and if your nails need reshaping it's a great time to throw that in but if you just need a quick cuticle pick me up you can skip that step.  So here's the how to:

Put the gel cuticle remover on cuticles and let it sit for three to five minutes.  The gel is important because this is a mani you can do on the go and having a liquid can be messy.  If you're sitting down to do this you're welcome to use a liquid BUT keep in mind that liquids don't stay on the nails as long either whereas gels are going to sit on the cuticle and penetrate them.  Since we're not using water to aid in softening them it's going to help a lot to have the gel. 

After it's set for a bit use your pusher to gently push back the cuticle.  If you're keeping up with regular mani's and cuticle care you should not have anything to nip off so this should be super simple and effective. I always keep nippers on me and if your cuticles are pretty bad you'll want to add them to this routine.  However, as you do it more you'll find you don't need them.

Step three is to add the lotion. Again if nails are very bad and you're doing this at home you can add some oil and let it penetrate three or four minutes and THEN add the lotion.  But if you're on the go just add the lotion and you're done!  Easy ten minute manicure that will keep your cuticles under control this winter!

What are your favorite products for winter?

Rehab your nails: How to do a paraffin dip


It's paraffin day!! Today I'm going to show you how you can give yourself a paraffin dip at home. First I'll tell you what you need to have to do this and then I'll tell you some ways to make this easier on yourself!  You can also give these to friends or family members but please be sure that if you use this for multiple people you do NOT return the used wax to the machine. So above are my preferred tools for doing this.

You need:
  • A cuticle oil
  • A sugar or salt scrub
  • A thick, creamy lotion
  • A paraffin warmer
  • A towel
  • Plastic paraffin gloves, plastic shopping bags OR cling wrap

Optional items include heated hand warmers or towels.


My paraffin bath was a Christmas gift but you can score one like it on Amazon for $29.99. It's fairly easy to use, deep enough to submerge my entire hand, and heats pretty quickly. You can buy larger ones with fancy settings for heat and timers but honestly, this basic one is all I need.  It comes with the wax and you can pick up refills at most beauty supply stores or online. They come in lots of colors and scents. Just be sure that the paraffin you buy is for use on skin and that whatever scent you choose goes well with your lotion!  You'll want to turn it on to heat in advance.  I do this about two hours before hand. 

When you're ready to go, lay out your supplies. I'm doing this myself (WITH ZERO help) so I'm going to get my bags ready to slide my hands into by sitting them in the sink. If you're using the ones specifically for paraffin, you'll want to somehow get them opened so you can slide your hands in (without grazing the sides). If you're using cling wrap, simply lay out two, square pieces about twice the width of your hand and about two or three inches longer.


It might be hard to see here but I've got them just opened up and next to one another in the sink. Plastic bags are free, I have tons and I like to recycle them so that's why I choose to use them rather than invest in anything else. I DO use cling wrap sometimes though and it works just as well.  You'll also want to open your cuticle oil and the top to the warmer. Be sure your lotion is open and ready to go as well.  You'll want to start by washing your hands and then using a sugar scrub to exfoliate them well.  I'm using Zoya's sugar scrub. It smells yum and works well.  You can use any scrub you have. Some people also like salt scrubs and this is fine as well but salt is a bit more harsh and can also irritate small cuts on ones hands. For this reason I like the sugar ones. 


Next, thoroughly dry your hands and then generously spread oil on the nail and cuticle area. We talked about oils this week so if you need some ideas of what to go for there is plenty of info there!  I'm using CND Solar Oil.  During the year I use it with the Almond lotion but today I want a heavier lotion so I'm going to use my Hempz brand. I normally wait a few minutes to let it soak in some before I add the lotion but you certainly don't have to.  Add the lotion next and be sure again to be generous with it. DO NOT rub it all the way in.  I don't know why but when I was in nail school we always used EssieSpa Pedicure Hydro-Masque. It's not really for hands but it did the trick!  


Now hold your hand over the bath and submerge it. Don't go all the way to the bottom but you should go deep enough that the entire hand is covered.  If, for whatever reason, your bath is not deep enough you can just turn the hand over and do the other side that way.  Then lift your hand back out. Do this three to five times to build up a nice coat of paraffin. I usually do four, then I'll let it hover over the bath for a ten count just to be sure there are no drips. Then I'll put it in the bag and wrap it up.  If you're using cling wrap, sit your hand on the square, wrap one side over and then the other side over and then the top if there is any hangover (there should be a bit).  Since I'm doing this alone I dip one hand and sit it in the bag, then dip the other and then when both hands are in the bags I lift my hand upward (so the bag falls over my wrist, and then twirl my hands together to seal. If you're using heated mitts or towels, this is the time to put those over your hands. You can also wrap a dry, room temperature towel around them to keep the heat in.  Wait 5-10 minutes to remove.  Remember that even though they feel cool to you before that, they're still warm so don't be tempted to take it off early!! I usually do seven minutes.


Now remove the bag and slide off the paraffin.  If it's just you, you can drop it back in the bath and reuse it (this is why you first WASH YOUR HANDS!!).  If you're sharing the bath then put both wax hands into a bag and put them in the bin.  There may be some lotion remaining so rub it in and voila! Baby soft hands.  You can thank me later ;)

Rehab Your Nails: My lotion has WHAT in it?!


Make Over March continues today with a little wake up call as far as your lotion goes.  Everyone knows what lotion is meant to do; moisturize your skin.  For the most part, almost any lotion is going to live up to that basic expectation. Yet haven't we all experienced the dreaded "greasy" feeling, or even dryness after using lotions? That's because all lotion is not created equal.  Even lotions specifically targeted for your nails aren't always the best choice.  We're going to visit oils and the best ones to choose tomorrow but something to keep in mind with both is that there are certain things which your skin just won't absorb.  When a product doesn't properly absorb it can cause you to have a greasy film left on skin where said ingredients just simply won't penetrate the skin. That's bad enough. WORSE is that some lotions actually contain ingredients which aren't good for your skin. 


Let's dispel a little myth I keep hearing first: "There's alcohol in my lotion and it's drying out my skin!!"

Ok, so that's SORT of true.  There are many different types of alcohol though and not all of them are drying to the skin. So what should you look for and what should you avoid? Well there's where it gets a little tricky. Here are some commonly found alcohols in lotions and what they ACTUALLY do for you.

  • Cetearyl Alcohol: This actually makes the lotion smooth and creamy. It's a combination of Cetyl and Steryl alcohol.  It also stabalizes the product, holding the different ingredients together as well as working as a carrier to help the product absorb.
  • Cetyl alcohol: is used as an emollient, lubricant or surfactant, and helps make spreading of a liquid easier.
  • Ethel Alcohol: used as a preservative
  • Benzyl Alcohol: usually a preservative or used as part of a fragrance
  • Steryl Alcohol: Is an emollient which aids in softening skin.
Now that we've sorted that, let's focus on the bad news: fragrances, added colors, and other preservatives and unnecessary ingredients CAN dry out your skin.  They can also cause allergic reactions and more to the point, they simply don't moisturize as well as they could be. Just look at that ingredient list. I bet less than 20% of you can pronounce half of those ingredients, let alone know what they do or don't do. 

OK let's look at another lotion:


I apologize for the quality, my camera really didn't like this one.  But just glance over the ingredients list here versus the one listed above. You're always going to see some chemicals because the lotion has to be preserved and stay a certain texture at various tempuratures and etc. But focus on the fact that here, MOST of the ingredients are easily recognizable: shea butter, sativa seed oil, honey elixir, sweet almond oil, aloe, vanilla fruit extract, water. Moreover, versus the one above, it boasts several types of natural (oill/shea) moisturizers rather than just two and a lot of chemical grossness. Also notice how low on the list the Alcohol is in this one as well as the fragrance, where the one on the top has the ingredients listed much higher. That indicates that this one has LESS of those ingredients which is a good thing.

So what's the point? Short of using straight oils or butters, your best option for lotion is going to be one which contains various oils, little or no fragrance and doesn't list any alcohols or preservatives as the top five ingredients. My personal favorite are the Hempz line but you can shop around to find yotr best match. :)

Here are some other ingredients to watch for:

Glycerin absorbs A LOT of water and can therefore deplete the skin of moisture by sapping what moisture is in the skin. Use it as a moisturizer with caution. High levels of glycerin has no proven increased benefit for skin. In fact, pure glycerin (100% concentration) on skin is not helpful and can actually be drying, causing blisters if left on too long as they can increase water loss by attracting water from the lower layers of skin into the surface layers of skin where the water can easily be lost into the environment.

Petroleum or Petroleum jelly can create the illusion of moisturized, hydrated skin, all the while suffocating your pores. It's water-repellant and not water-soluble, meaning it merely seals the barrier so that moisture does not leave the skin. So while you might feel the instant gratification of a softened surface, you're actually drying out your pores by keeping out air and moisture. What's more, the thick texture makes it difficult to cleanse from the skin.

Instead choose lotions with stearic acid* and natural oil.


*Stearic acid is a fatty acid that is found naturally in the protective outer layer of the skin. It is one of the building blocks of the lipid layers in skin, which help to form a barrier and preserve the skin's natural moisture.


Rehab your nails: Make-over March


So if you're anything like me you've basically been living in a tundra the past three months. It's been one snow storm (or worse--ICE storm) after another, and even on days when there isn't snow the temperature is brutal. It's REALLY wreaking havoc on my nails. So I wanted to do a little mini series for you guys with some quick tips on how to keep your nails hydrated when it's stupidly cold, which lotions are the best to use and some general health tips to keep your nails in tip top shape any time of the year. I'm starting today and the series will continue throughout the week.  I want to hit on just some basic nail care tips today and tomorrow I'll tell you why your moisturiser might be causing you more harm than good. On Friday I'll show you how to do a paraffin dip at home and how to save money by doing them yourself rather than at the spa.  So here we go:

Lesson of the day: nail health starts at the ROOT of the nail.  It's kind of like when you're growing a flower or a vegetable. If you plant it and then you do nothing with it, it's going to die. If you plant it and then care for it and then give up on it...well, it will be great for awhile but then it will start to wilt, and I'm sure ALL of us are guilty of seeing that wilted flower drop off (or close to!) and then hastily gluing it back on and starting up a routine again. Unfortunately, it's just too late by then.  The things you do to your nails now, you may not actually SEE on your nails for four to six weeks. So even if you're using oils like crazy now if you weren't four weeks ago then it may seem like it's not doing much.  Look, your nail is not alive. I mean, it's just like your hair.  Once your hair has a split end, you wouldn't glue it back and let it grow would you? You can moisturise the crap out of it but it's not going to do much.  There isn't really a fix for nails which are already damaged.  


That said, you CAN make them a little better while at the same time improving the health of the nail which is still growing! One thing I see people do a lot and I REALLY caution against is using a strengthener to try to "boost" nails when they're in a state of disrepair. I'm not saying you can't or shouldn't use them at all but they should never be used as a last resort. Why? While strengtheners work on the surface of nails (ie the part which you can see) they also dehydrate nails. That means if your nails are peeling let's say, the strengthener can actually make this worse. It can also hide peels which means you can't really see what you're working with. If you HAVE to use a strengthener I would advise STRONGLY that you use a really good cuticle oil daily in times when nails may be dehydrated by other factors (like weather). A good way to start out with a strengthener is to cut nails as short as you can and then start with it for two weeks. If you need more time, take a week off and repeat another two weeks. Continue as needed so long as there are no side effects. Be sure to remove EVERYTHING from nails once a week or every other week and take a good look at your nails to be sure that they're on the mend rather than worse off! You can also curb peeling nails without the strengthener by just giving them a quick coat of clear polish OR better, a hemp or fiber infused base coat (I like this one, by Duri) under a colored polish. These will add strength without stripping moisture. Remember that health starts on the inside, and stay hydrated by drinking lots of water as well! :)

Stay tuned tomorrow to find out why your lotion could be causing more harm than good!

Horse Power Nail Compare


The end has come!! As promised today I'm going to be showing you the difference between using a nail strengthener and simply not polishing your nails. Above you see my final results of four weeks of butter LONDON Horse Power. As I mentioned in my last post I had a bit of peeling but nothing really major and most of it on a previously injured nail. You can see that there's some significant growth and no breaks so that's definitely a plus! On this hand I went polish free with just strengthener for the first week and then after used the strengthener as a base coat under polishes. On my other hand I used NO products. Here are the results of that...

Several things to note here.  One is that the color is very different. Even with a good base coat nails will still show some discoloration from long term polish use. You can certainly buff this off but buffing frequently also weakens nails (especially if done improperly!) so it's always easier to prevent! Obviously no peels here either which is pretty typical for me as my nails normally stay very strong and healthy without any treatments. The length is the last thing to note. I do not have pictures of the original starting point of my left hand so while you can see that there is more growth on this side than the other I know some of you out there will say it's a lie since I have no proof of my start. You can take my word for it or you can choose not to but it's really a smallish amount so it's not super important. Here's what I really want to show you. Look at the shape of my nails on my right hand vs my left. The hand I left product free has much wider nails and they seem more square. This is NOT because of shaping. It's because of this:


The C curve.  See a lot of people, even professionals, want you to believe that polishing your nails does ZERO damage. Well as a professional, a freelancer and a fellow polisher....I want you to know that this is false.  Let's look at this like your hair.  Now some hair products and hair professionals will tell you if you use this product or that or the other, that heat will not damage your hair. But you know this is not true. Heat, dye, even shampoo damages hair. Now if I bleach my hair it's obviously much more damaged than if I simply blow it out. But damage is damage. Acrylics are a little like bleaching and polish is more like flat ironing. But still you can see the damage. I DO moisturize my nails regularly. They get cuticle balm twice a day and lotion at least that and most days more. Previously I've even used a moisturizing base coat but these things will NOT prevent damage. They just minimize it. Some of you may not see right away what I'm talking about so I've drawn some lines to help you on the below pic...


Look at the height of my C curve on the right vs the left. It's nearly double. This is caused by the polish. It creates dryness which causes the nail to curve under more. THAT in turn makes it easier to break the nails. Over dryness can make them more brittle which increases this risk. But in general this is simply changing the shape of my nail. It can be more slight on some people than others but I think that most of us are simply too used to the polished shape to realize that it's not the one we were born with!  Is it serious? No. Will it hurt you? No. But is it better for your nails to grow out polish free? Well...let's just say, it will give you a much stronger base to start polishing!! :)  (as a side note: you can also see in this picture that the Horse Power did not add any thickness to my nail!)

Have you ever tried this experiment? What were your results?

These are my nails...Rejuvacote Edition


Alright, it's time for my second post on nail strengtheners.  I wish these didn't take so long to put together, but it really requires around four weeks to see the full results on most strengtheners.  You need to allow your nail enough time to make a significant growth in order to see how the treatment is affecting your nail.  That's one reason I really don't care for using treatments.  You're meant to use them for two weeks only, for safety reasons, but two weeks isn't long enough to maximize results. I digress.  My first treatment post was about OPI Nail Envy. You might remember from that post that it caused MAJOR peeling on my nails and really, it didn't help them much. I left my other hand polish free while I was using that treatment and my polish free hand came out the same strength and peel free. Plus the growth on that hand was double the OPI hand.  So I decided to try out Duri Rejuvacote since many of you rave about it.  The above is my starting point.  These are all sort of shoddy photos and I apologize for that but my camera wasn't always available during this trial and I wanted to be sure to have more updates!  Anyway you can see that they're sort of thin and not very long or strong. For the life of me I can't remember what had caused the thinning at that time since I haven't had any  enhancements on my nails in some time but I think it was just too much polishing and buffing.  I wore the Rejuvacote for the first week with no polish and reapplied a new coat everyday as per the instructions.  Here are my nails after the first week:


There's not a crazy amount of growth but that's normal.  You can't expect miracles in a week!  The really great thing to notice here is that the thinning nail should have grown out and made a weak free edge.  It didn't.  The growth is strong and my nails look tons healthier already.  I kept using the Rejuvacote for two more weeks, but this time I polished intermittently.  I used it as a base coat and  reapplied OVER polish every day as per the instructions, except in cases where I changed the polish. Then I just started over with the base coat. Here are my nails two weeks later:


NOW we're seeing progress. I broke my index but this was because of a previous injury which grew out. You can sort of see it if you look at the second picture and even a little on the first. It was a bend low on my nail and when it grew up the plate it turned into a deep peel. I also managed to break my pinky nail BUT it took A LOT. I actually shut it in a car door and normally this would probably cause it to just crack off cleanly. In this case, it bent backward and I had to TEAR it off with my teeth. I didn't have clippers with me and I couldn't get it to just tear off. Insane. I noticed minimal peeling but not nearly so bad as with the Nail Envy. I also noticed that my nails looked and felt much thicker but they weren't brittle like some strengtheners make them. I continued using this for one more week and this is where the story changes.  I wasn't able to get a picture of this guys but...this caused separation of my nail bed from the nail. :(  Now. Before I get you all terrified, let me explain.  At first when I saw my bed separate from my nail I freaked. the. flip. out. Legit. I was REALLY freaking. Of course I stopped using the strengthener and all polish/remover/etc to allow the bed to reattach and be assured this was not from another source. It was not. However, upon further investigation, I realized something.  It wasn't actually causing separation. The strengthener caused not only my NAILS to grow, but also my upper cuticle. This is the skin on the back of the nail that attatches the base of the free edge to the nail. It was growing up MUCH higher than usual. You can tell when this happens because A) you'll notice that your nails look MUCH shorter, even though the free edge is long. It makes your beds look longer. and B) you can gently separate this skin from the back of the nail plate without pain. It had already started separating itself and when I stopped using the Rejuvacote, all my other nails followed suit. Still...I don't like that. If it's making my skin grow extra...who knows what else it's doing? Moral? Rejuvacote DOES work. BUT...stick to three week intervals and then take a week or two off and start again!!

Have you used Rejuvacote? Did you love it? 


Rehab Your Nails: How to fake a long nail bed


OK...the time has come. Today I'm going to show you how you can quickly fake the look of a longer nail bed.  This only really works with specific manicures and the best example is a french.  What you're looking at now is my bare nails.  Notice that the free edges are not all the same length.  This happens when the beds on some nails are longer than others and it's pretty common.  When my nails are polished, you don't notice the difference and they all appear uniform.  There are ways to change that too, at least to some extent but it's also why some people choose to file their nails with polish on.  I don't recommend that but filing is not the topic of the day so let's focus instead on how we can polish these in a way that makes them all uniform and also long and slim.  In this next picture, I have polished my nails with a series of different French tones. 


From left to right I have used: Sheer Nude, Bare Rose, Beverly Hills Plum and then a clear coat for the base polish. These are all by Orly (except the clear which is just Seche Vite).  I used Zoya Purity to do the tips.  There is nothing special going on here. I just did a standard French following my natural free edge.  To make them appear a bit more uniform, I've drawn the white line down a bit on some nails. If you have longer nail beds that's not going to be an issue for you but to create a larger free edge is suicide for shorter nails. You're only increasing the shortness of the bed.  So what can you do?  Here's a trick that pro's use...


Start by polishing your nails with an opaque but flesh toned polish.  I've used Zoya Avery here and it looks much closer to my skin tone in real life than in this picture. You may have to do some digging around to find a good tone to match your skin. I really recommend checking out the Zoya nude tones first because they have several really great ones that should fit anyone. (I picked up Kennedy first but she was too pink for me).  Once you have your base down, polish a regular French manicure on.  Just for thoroughness I have used the same combination of French tones OVER the nude color for this manicure. Again from left to right we have: Sheer Nude, Bare Rose, Beverly Hills Plum and then a clear coat.  You can see that it affects the color of the base just as it did my natural nail bed.  Now I want you to notice what I've done with the white line.  On my index and pinky nail, the bed is exactly the length it was above. I haven't extended the bed or the free edge, I simply polished along my natural line.  Now look at my ring finger.  Here I've extended the free edge (the white line) to make my nail appear longer but my bed appear shorter. This trick works well for longer beds because it can make your nails appear longer without stunting a short bed. You can see that because my beds are longer, it didn't make them particularly wide or short looking, rather it just gives the appearance of a longer free edge.  Now look at my middle finger. Here I've shortened the free edge dramatically. now my nail looks shorter, however, my nail bed looks longer. See how easy it is? Those with shorter nail beds can use this trick to lengthen them while those with longer nail beds can use it to lengthen the free edge in just a few minutes!  Try this trick with your own nails and experiment with different sizes of white and nude to see what works best for you! :)

*Note: this trick is intended to give the appearance of a slightly longer nail bed or free edge. It does not change the actual length of your nails and should not be used to drastically increase these proportions.

Popular Posts

Like us on Facebook

Flickr Images